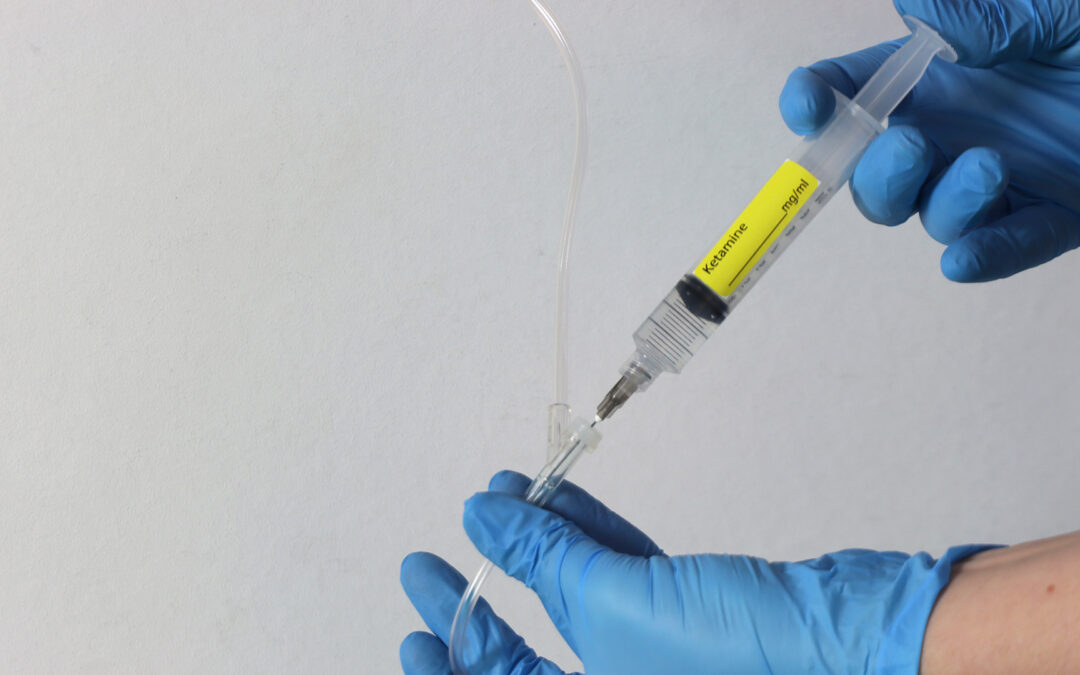
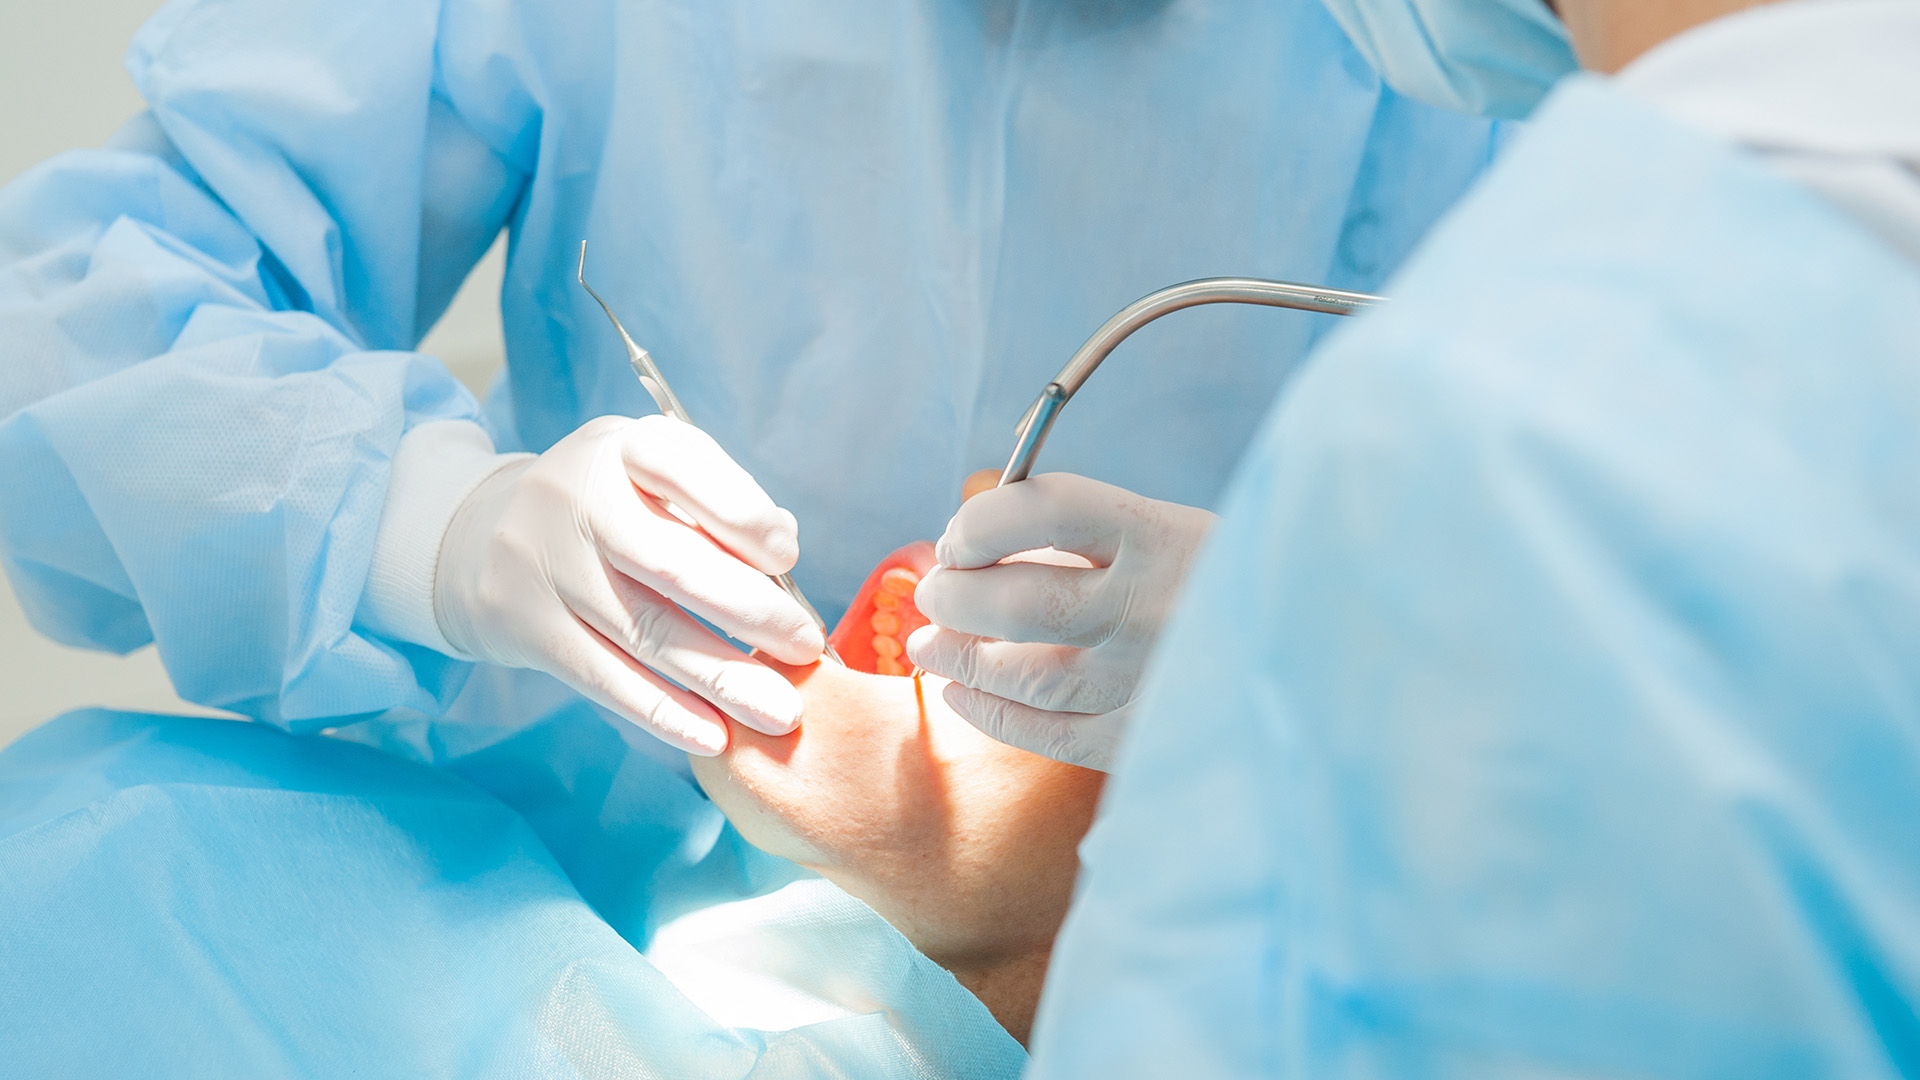
Intravenous (IV) anesthesia sedation is a safe, effective way to help you stay relaxed and comfortable during medical or dental procedures. Delivered through a small catheter placed in a vein, IV sedation lets your provider fine-tune the level of relaxation quickly and precisely. It reduces anxiety, minimizes discomfort, and can make treatment more efficient. This guide explains what IV sedation is, how intravenous anesthesia sedation works, what to expect at each stage, and how to determine whether it is right for you.
What Is IV Anesthesia Sedation?
IV anesthesia sedation involves delivering sedative and pain-control medications directly into your bloodstream. The goal is to lower anxiety, enhance comfort, and create a calm state so your procedure can be completed safely and smoothly. Unlike general anesthesia, most IV sedation options allow you to breathe on your own and respond to verbal cues while remaining comfortable.
Levels of IV sedation include:
Minimal sedation: You feel relaxed but remain awake and responsive.
Moderate (conscious) sedation: You are drowsy and may have slurred speech, but you respond to voice and touch; many patients remember little or nothing afterward.
Deep sedation: You sleep through much of the procedure and may respond only to repeated or stronger stimulation. Breathing is usually spontaneous, though extra support may be needed.
Common IV medications include benzodiazepines (such as midazolam) for relaxation and reduced memory formation, opioids (such as fentanyl) for pain relief, and agents like propofol for deeper sedation with rapid onset and offset. Compared to oral medications, IV drugs act faster and can be precisely titrated. Compared to nitrous oxide, IV sedation often provides deeper, more reliable relaxation and amnesia. Your provider will select medications and doses based on your health, the procedure, and your preferences.
How IV Sedation Works in the Body
Once administered, IV medications circulate quickly and act on the central nervous system. By enhancing calming neurotransmitters and reducing pain signals, they lower anxiety, diminish awareness, and make discomfort less noticeable. Because the IV line stays in place, your provider can adjust the dose in real time to reach and maintain the desired level of sedation.
Typical effects include relaxation of the brain’s arousal centers, decreased pain perception, and a steadier, slower breathing pattern. Heart rate and blood pressure may gently decrease. These changes are monitored continuously to support safety and comfort.
Onset usually occurs within seconds to a few minutes. Duration depends on the specific drugs, your metabolism, and the length of the procedure. Recovery begins shortly after the medications are reduced or stopped. Many patients feel alert within 30 to 90 minutes, though mild drowsiness may persist for the rest of the day. A responsible adult must drive you home and stay with you until you are fully recovered.
What to Expect Before, During, and After IV Sedation
Before: You will complete a pre-procedure evaluation covering your medical history, medications, allergies, and prior anesthesia experiences. Inform your provider about sleep apnea, heart or lung conditions, or pregnancy. You will receive fasting guidelines, often no solid food for 6 to 8 hours and clear liquids up to 2 hours before your appointment, unless instructed otherwise. Continue routine medications as advised; certain drugs like blood thinners, diabetes medications, or sedatives may need special instructions. You will review and sign informed consent outlining benefits, risks, and alternatives and how intravenous anesthesia sedation works for your specific treatment.
During: An IV line will be placed, and monitors will track your oxygen level, heart rate, blood pressure, and breathing. Supplemental oxygen may be provided through a small nasal cannula. Most patients feel warm, calm, and drowsy. You might hear voices but are unlikely to remember details. Local anesthesia is often used at the treatment site for targeted pain control while IV sedation keeps you relaxed. Your provider will adjust medications as needed to maintain steady comfort and safety.
After: You will rest in a recovery area while your vital signs and alertness are observed. Temporary effects can include grogginess, dry mouth, mild nausea, or chills. You will receive clear instructions about when to start fluids and food, how to manage discomfort, and which medications to take. Avoid driving, alcohol, vaping, operating machinery, and important decisions for at least 24 hours. Plan a quiet day, and call your provider if you have persistent nausea, severe pain not relieved by medication, fever, or redness, swelling, or drainage at the IV site.
Safety, Risks, and Who Is a Good Candidate
When administered by trained professionals with appropriate monitoring, IV sedation has an excellent safety record. Common side effects are usually mild and short-lived, such as drowsiness, nausea, or minor bruising at the IV site. Less common risks include low blood pressure, slowed breathing, allergic reactions, or, rarely, airway complications. Continuous monitoring and experienced providers help reduce these risks, and emergency equipment is readily available.
Candidate evaluation considers your medical history, medications, age, and overall risk. Extra caution is taken for individuals with obstructive sleep apnea, significant heart or lung disease, severe obesity, or pregnancy. Children, older adults, and patients using sedatives, antidepressants, or opioids may require tailored dosing. Share all prescriptions, supplements, and recreational substances, including cannabis and nicotine, as they can influence sedation.
Ridge augmentation is a specialized procedure that rebuilds jawbone where it has thinned or collapsed after tooth loss, extraction, or trauma. By restoring the natural shape and volume of the alveolar ridge, your doctor can create a stable foundation for dental implants, improve denture fit, and support facial contours. This guide explains what ridge augmentation is, how ridge augmentation works step by step, and how to care for your results for the best possible outcome.
What Is Ridge Augmentation and Why It’s Done
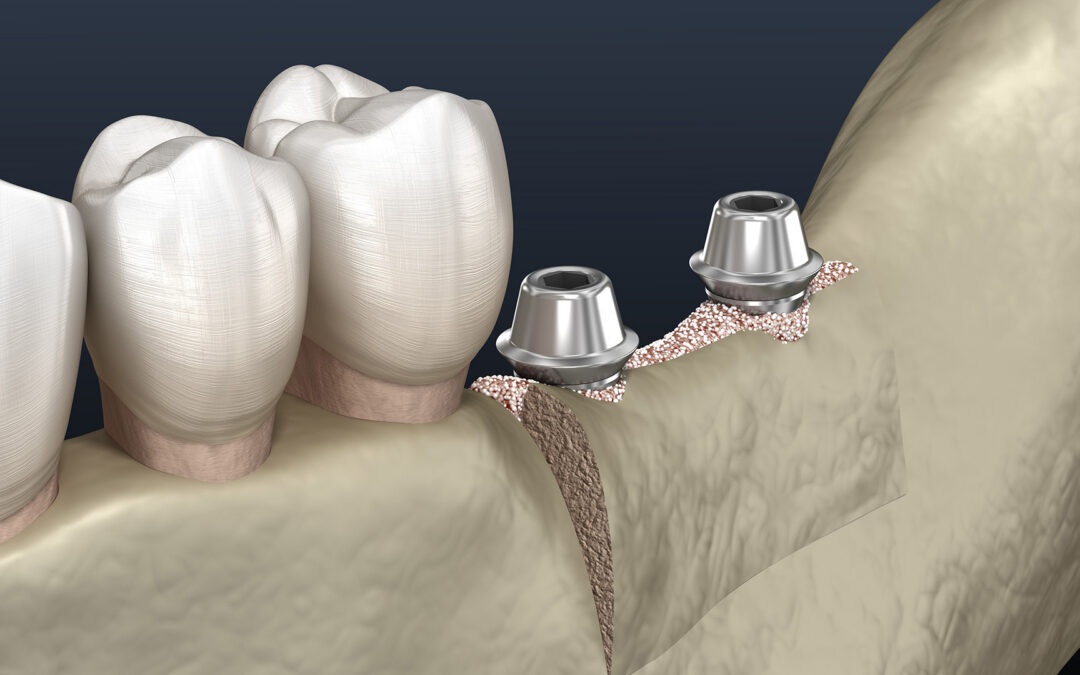
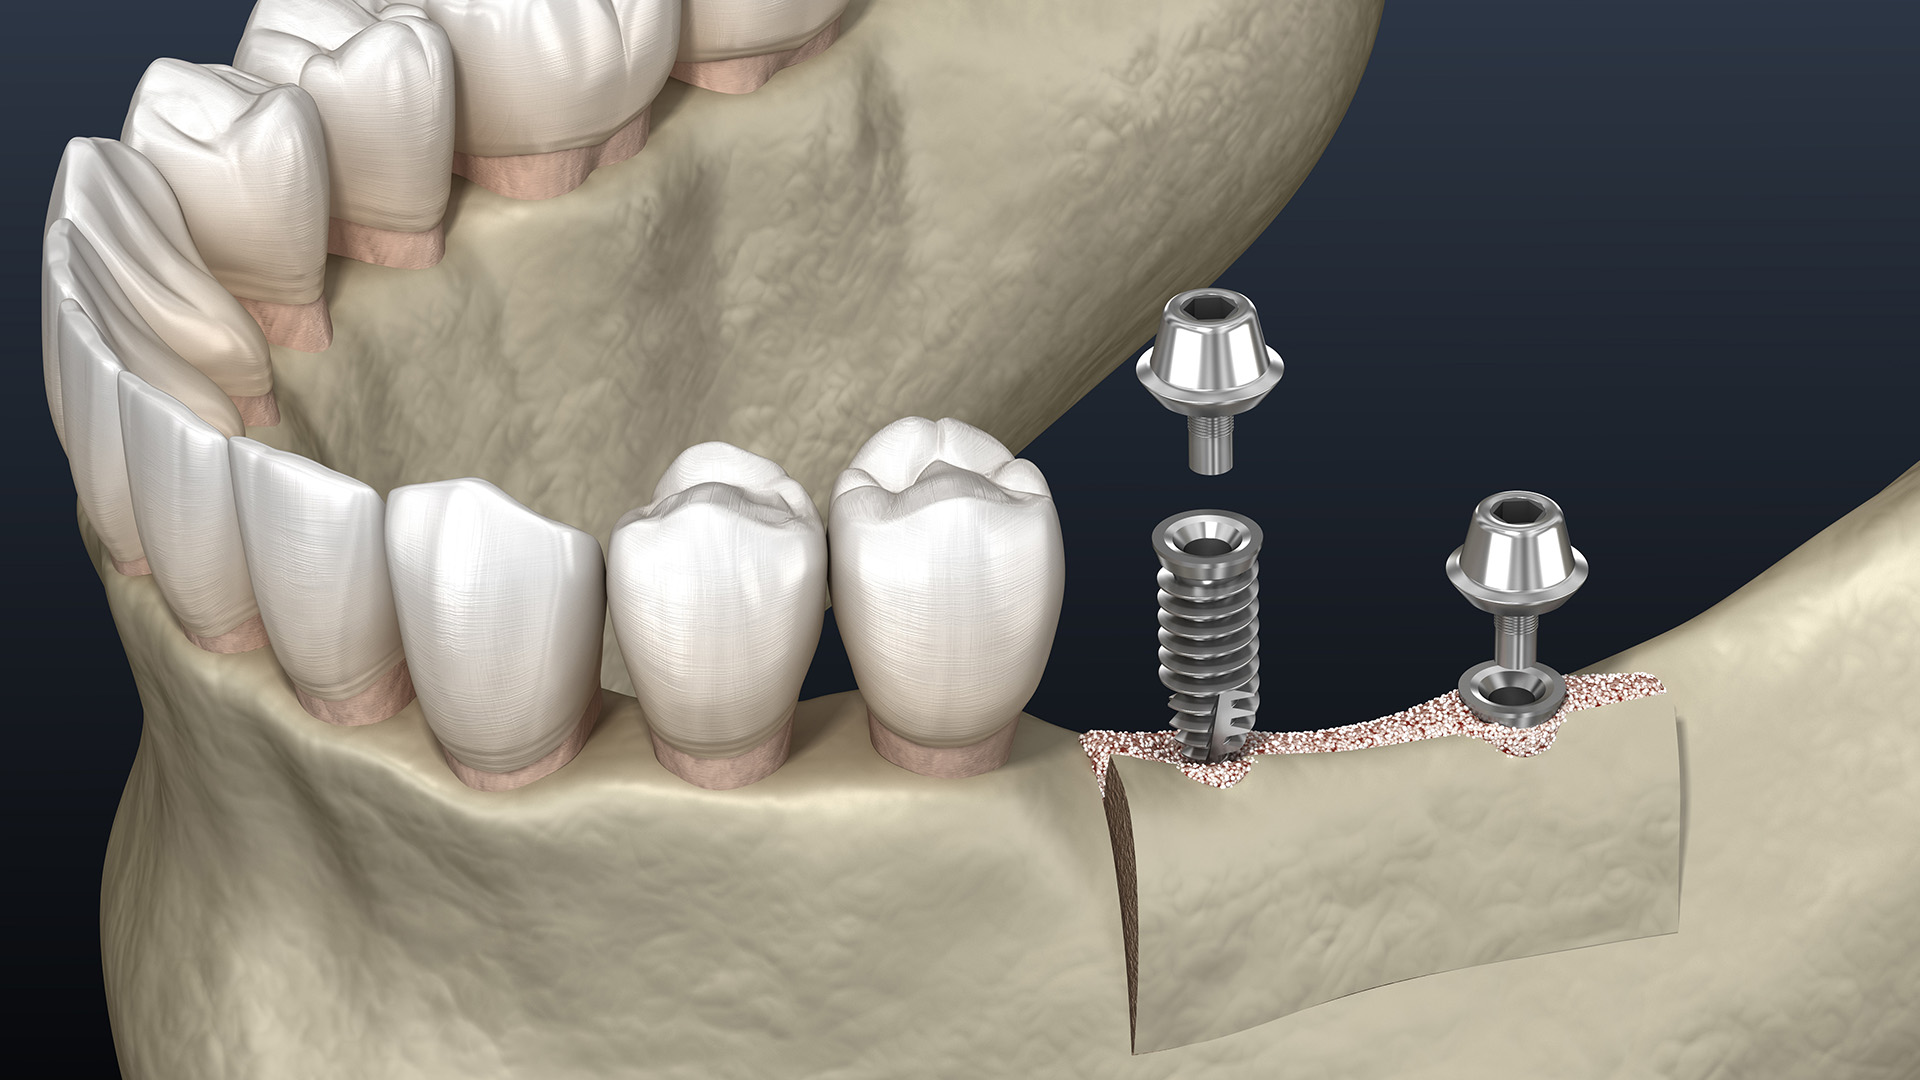
Ridge augmentation is a focused type of bone grafting that rebuilds the height and width of the alveolar ridge, the bone that supports the teeth. While bone grafts can be placed in various parts of the mouth or jaw, ridge augmentation targets the specific area where bone has been lost, often following tooth extraction or long-standing tooth loss.
Patients may benefit from ridge augmentation when bone loss results from tooth loss and resorption, trauma or injury to the jaw, infection or periodontal disease, or congenital conditions that lead to underdeveloped ridges. Without adequate bone volume, implants may lack stability, dentures can loosen or irritate soft tissues, and facial support can diminish, creating a sunken appearance around the lips and cheeks.
Rebuilding the ridge restores proper contours and allows implants to be positioned in the ideal location and angle. It also enhances the stability of bridges and dentures and can improve chewing function, speech, and overall comfort.
The Ridge Augmentation Procedure: Step by Step
Planning begins with a comprehensive exam, digital imaging such as CBCT scans, and impressions or scans of your bite. Your doctor will evaluate bone volume, map vital structures like nerves and sinuses, and design a personalized treatment timeline. If dental implants are planned, the team will coordinate timing, placing the implant after healing in most cases, or in select situations, at the same time as the graft.
During surgery, the site is numbed with local anesthesia, with sedation available when appropriate. The doctor gently opens the gum to access the ridge, removes any fibrous tissue, and prepares the area to receive the graft. Graft materials may include autograft (your own bone), allograft (donor bone), xenograft (animal-derived), or synthetic options. A thin barrier membrane is often placed over the graft to protect it and guide new bone growth, and the gums are repositioned and sutured for secure closure.
Recovery usually involves mild swelling and tenderness for a few days. Most patients return to normal daily activities within two to three days, while the graft matures over several months. Early follow-up visits occur within one to two weeks to monitor healing and remove sutures if needed. Additional appointments and imaging help confirm when the ridge is ready for implant placement or prosthetic work, commonly around three to six months depending on the case and graft type.
Outcomes, Risks, and How to Care for Your Results
Successful ridge augmentation builds strong, healthy bone that improves the stability and longevity of dental implants, enhances denture fit, and restores natural facial contours. By recreating proper ridge dimensions, your clinician can place implants in an ideal position, supporting better bite alignment, aesthetics, and long-term function.
As with any surgery, potential risks include infection, bleeding, graft exposure or failure, delayed healing, and in rare cases, nerve irritation or sinus involvement depending on the site. Your doctor reduces these risks through sterile technique, careful planning, and appropriate use of membranes, fixation, and medications. If complications occur, they are managed promptly with targeted care such as antibiotics, graft revision, or protective coverings to support healing.
Home care is essential for a smooth recovery. Follow your post-operative instructions closely:
Stick to a soft diet initially and avoid chewing on the surgical side.
Keep your head elevated for the first 48 hours to minimize swelling.
Use prescribed medications as directed and apply cold compresses during the first day to reduce discomfort.
Keep the site clean by gently rinsing with a prescribed mouthwash or a saltwater solution; avoid brushing the surgical area until your doctor advises.
Focus on balanced nutrition rich in protein, vitamins C and D, calcium, and adequate hydration to support new bone formation.
Resume light exercise after several days, but delay high-intensity activities until cleared at your follow-up visit.
With attentive care and regular check-ins, most patients experience predictable healing and are well positioned for successful implant placement or improved denture comfort. If you have questions about your specific situation, discuss your imaging, graft materials, and timeline with your clinician so you know what to expect at every stage.
A sinus lift, or sinus augmentation surgery, is a procedure that adds bone to the upper back jaw to make dental implants possible and predictable. If you have been told there is not enough bone height for implants near the molars or premolars, a sinus lift may be the safest way to create the support your implants need. Below is what the procedure involves, why it is recommended, and what to expect from start to finish. Understanding why you may need a sinus lift can help you plan the best path to successful implant treatment.
What Is a Sinus Lift (Sinus Augmentation)?
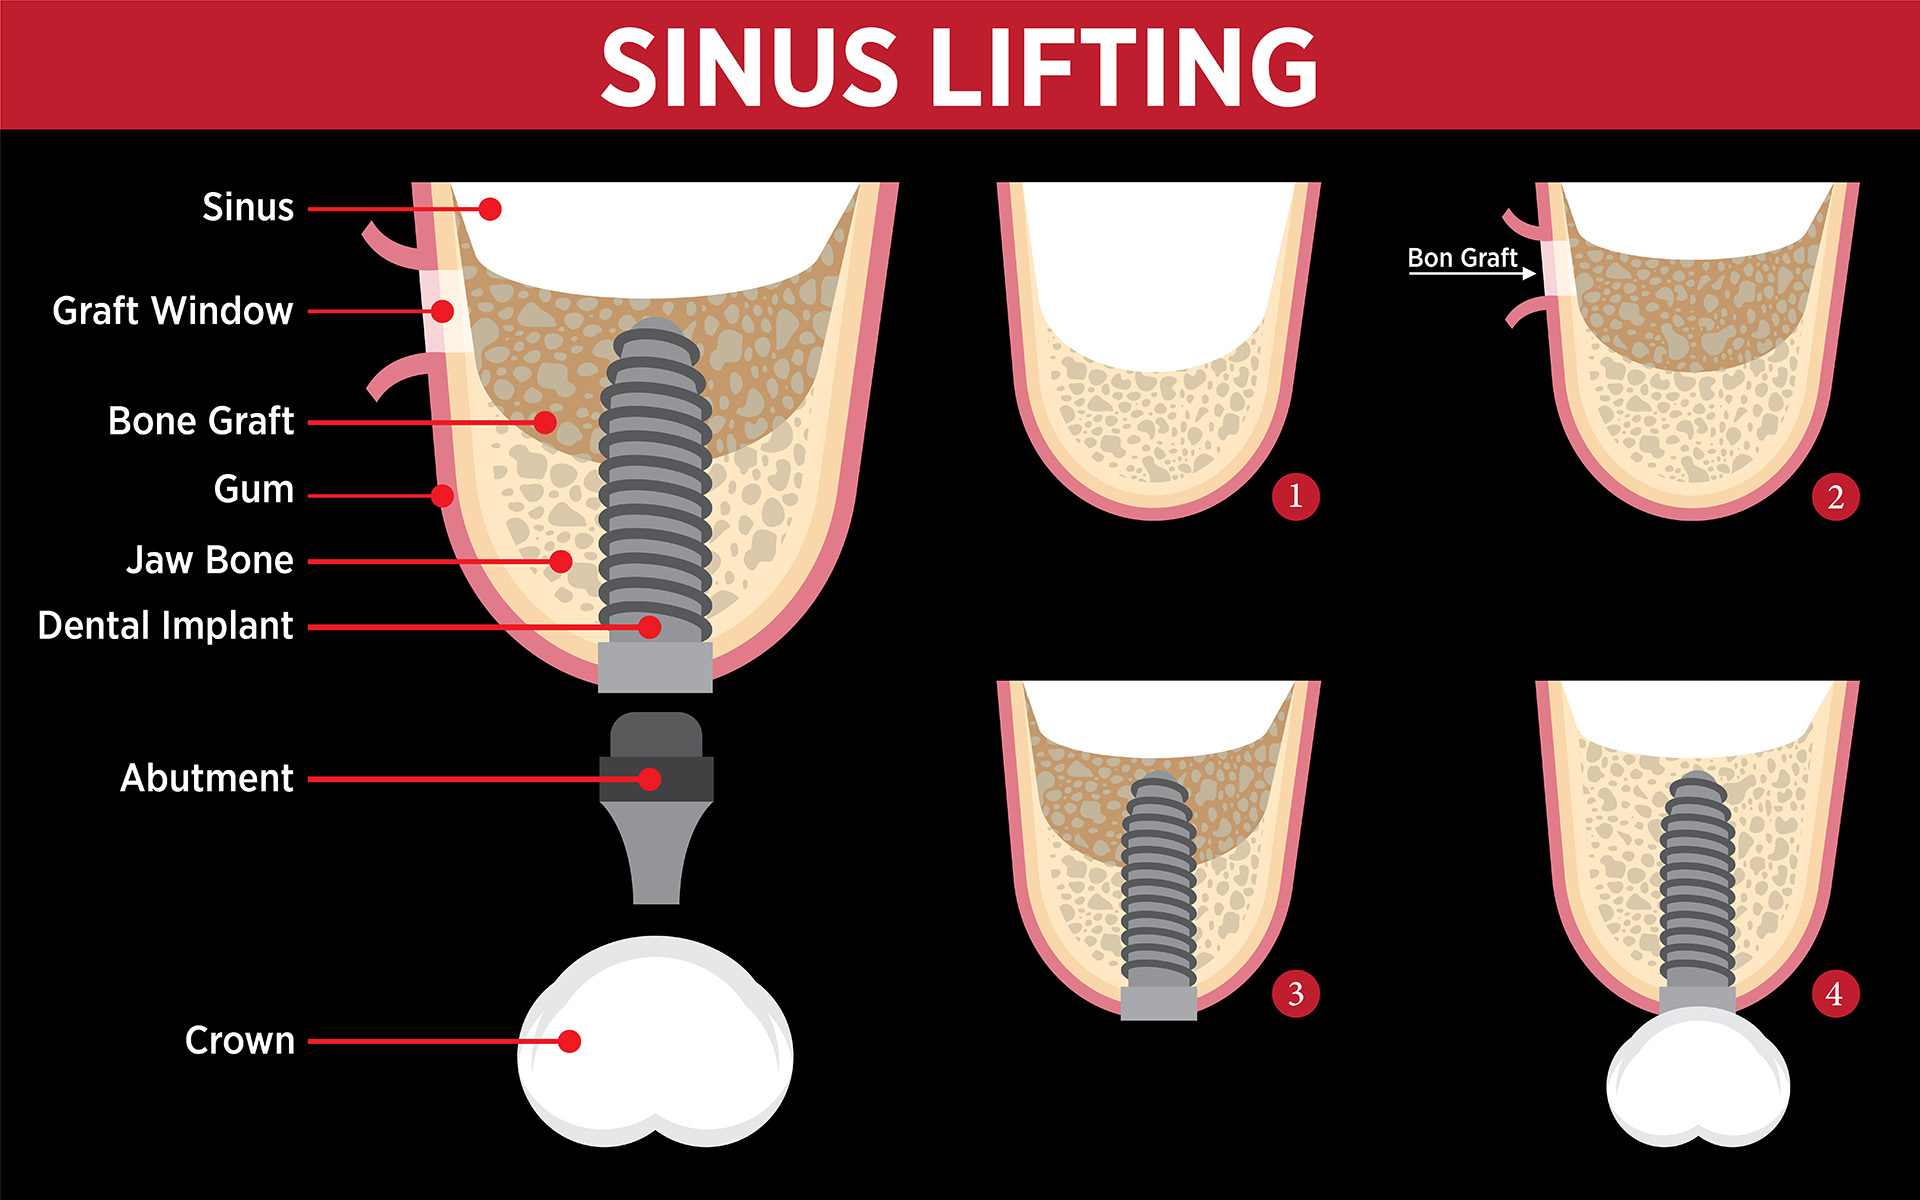
A sinus lift is a surgical procedure that elevates the membrane lining the maxillary sinus and places bone graft material beneath it. By carefully lifting the sinus floor, your oral surgeon or periodontist increases bone height in the posterior maxilla (upper back jaw), creating a stable foundation for dental implants.
The maxillary sinuses are air-filled spaces above your upper molars and premolars. After losing a back tooth, the bone in this area often shrinks over time. The sinus can also expand downward, leaving too little bone height for implant placement. Structures in this region include the Schneiderian (sinus) membrane, adjacent tooth roots, and the alveolar ridge where implants are anchored.
Two main techniques are used:
Lateral window approach: Chosen when very little bone height remains. A small opening is created on the side of the upper jaw, the sinus membrane is lifted, and graft material is placed underneath.
Crestal (osteotome) approach: A less invasive method performed through the implant site when only a modest increase in bone height is needed.
Your provider selects the approach based on your bone measurements, sinus anatomy, and implant plan. In both methods, sinus augmentation surgery is tailored to your anatomy to maximize bone gain and minimize risk.
Why You May Need a Sinus Lift
Several factors can reduce bone height in the upper back jaw. Common causes include prior tooth loss, periodontal (gum) disease, long-term denture wear that accelerates ridge resorption, and natural bone remodeling with age. Over time, these changes can leave the ridge too short or thin for stable implant placement. Understanding why you may need a sinus lift begins with evaluating these changes on three-dimensional imaging.
When bone height is insufficient, placing an implant without augmentation raises the risk of complications such as implant instability, sinus membrane perforation, or inadequate osseointegration (bone-implant fusion). A sinus lift adds vertical bone height so implants can be placed safely and predictably. This is a key reason why you may need a sinus lift prior to implant therapy.
Your surgeon may also recommend sinus augmentation surgery due to anatomical variations (such as a low-lying or large sinus), previous trauma that damaged the bone, or when planning implant-supported restorations like bridges or full-arch prostheses in the upper jaw. In each case, the goal is to achieve enough bone volume so implants can function like natural tooth roots.
What to Expect: Before, During, and After Treatment
Before surgery: Your team will review your medical history, medications, allergies, and sinus health, and take advanced imaging such as cone-beam computed tomography (CBCT). These scans measure bone height and width, map sinus anatomy, and guide a personalized plan, including the number, size, and position of planned implants.
During the procedure: You will receive local anesthesia, and many patients choose oral or IV sedation for comfort. For a lateral window sinus lift, a small opening is created in the side of the upper jaw, the sinus membrane is gently lifted, and graft material is placed beneath it. For a crestal approach, the membrane is elevated through the implant site using specialized instruments. Graft options include autograft (your own bone), allograft (donor bone), xenograft (bovine or porcine), or synthetic materials. The site is closed with sutures. In selected cases, the dental implant can be placed at the same time; otherwise, implant placement is delayed until the graft matures.
After surgery: Mild swelling, bruising, minor bleeding, and a feeling of sinus pressure or stuffiness are common for a few days. You will receive instructions on medications, rinsing, and activity restrictions, including avoiding nose blowing and straws, sneezing with your mouth open, and sleeping with your head elevated. Contact your provider if you notice persistent or worsening pain, significant bleeding, fever, foul taste or discharge, or signs of a sinus infection.
Healing Timeline and When Implants Can Be Placed
Healing occurs in stages as the graft integrates and new bone forms. If primary implant stability is achievable, some patients receive an implant immediately (simultaneous placement). In other cases, implants are placed after the graft matures. Many patients require 4 to 9 months before implant placement, depending on the amount of augmentation and the graft material used during sinus augmentation surgery.
Factors that influence healing include the graft type and volume, overall health and nutrition, tobacco use, sinus health (including allergy control), and oral hygiene. Following all post-operative instructions and attending review visits helps protect the graft and may shorten the overall timeline.
Typical follow-up includes a visit at 1 to 2 weeks for suture removal and site checks, and periodic reviews at 2 to 4 months with imaging when appropriate. A CBCT or targeted scan confirms bone gain and sinus membrane health before implant placement. Your surgical and restorative teams coordinate timing to support long-term success.
Costs, Risks, Benefits, and Alternatives
The cost of a sinus lift varies based on case complexity, the technique used (lateral window or crestal), the type and amount of graft material, anesthesia or sedation needs, and the surgeon’s fees. Insurance may contribute when the procedure is considered medically necessary, but coverage differs widely. Your treatment coordinator can provide an itemized estimate and discuss financing options.
All surgeries carry risks. Potential issues include sinus membrane perforation, infection, graft failure or insufficient bone formation, postoperative sinusitis, and rare events such as prolonged bleeding. Experienced clinicians minimize these risks using detailed imaging, careful technique, appropriate graft selection, and thorough post-operative care. If a membrane tear occurs, it can often be repaired during the procedure; if not, the site may be allowed to heal before attempting the lift again.
When successful, a sinus lift delivers adequate bone for stable, well-positioned implants, improving chewing efficiency, comfort, and long-term oral function. If a sinus lift is not the best fit for you, alternatives may include short implants in areas with adequate bone, angled implants to avoid the sinus, zygomatic implants for complex cases, ridge preservation at the time of extraction, or non-implant options such as hybrid prostheses or conventional dentures. Your provider will compare these choices so you can select the solution that aligns with your goals and health.
Is a Sinus Lift Right for You?
If you are missing upper back teeth and have been told there is not enough bone for implants, a sinus lift can create the foundation needed for a durable, natural-feeling result. With modern imaging, refined surgical techniques, and coordinated care, most patients experience predictable healing and excellent outcomes. Schedule a consultation to review your scans, discuss your options, and design a plan tailored to your needs. If you are wondering why you may need a sinus lift, a thorough evaluation will clarify whether sinus augmentation surgery, an alternative approach, or a combination of treatments is the best path to restore your smile.
Having several teeth removed in a single visit can feel overwhelming, but a well-coordinated plan helps most patients recover smoothly. Our team works closely with general dentists and oral surgeons to streamline care, reduce discomfort, and support successful healing and future restoration. Here’s what to know before, during, and after multiple dental extractions at once, including guidance on what to do after teeth removal.
When Are Multiple Extractions Recommended?
Removing several teeth at the same time may be advised for:
Extensive decay or infection that cannot be resolved with root canals or crowns
Advanced periodontal disease resulting in loose or painful teeth
Orthodontic plans that require space for proper alignment and bite correction
Impacted, nonfunctional, or compromised teeth that threaten overall oral health
Consolidating extractions can shorten total treatment time and limit the number of anesthetic appointments. Before recommending multiple dental extractions at once, your provider reviews your medical history, including heart or lung conditions, diabetes, bleeding disorders, pregnancy, and any prior anesthesia concerns. Share a complete list of medications and supplements, especially blood thinners, bisphosphonates, and steroids. Because smoking slows healing and raises the risk of dry socket, you may be advised to stop before surgery and throughout recovery.
Each tooth is evaluated with an exam and imaging. Prognosis, infection risk, bone support, and the tooth’s role in your bite are weighed against alternatives such as root canal therapy, periodontal treatment, or orthodontic movement. The final plan specifies which teeth to remove, the extraction sequence, and how those spaces will be restored after each removed tooth has healed sufficiently.
How Many Teeth Can Be Extracted in One Session?
The safe number depends on the complexity of each extraction, appointment length, your overall health, and the type of anesthesia. Many patients comfortably have two to four simple extractions with local anesthesia. More extensive surgical cases may be split into staged visits, or completed under IV sedation or general anesthesia with an oral surgeon, sometimes involving an entire arch. Patients often ask how many teeth can be extracted at once. The answer is individualized, and your clinician will outline a plan that balances comfort, safety, and goals.
Planning must align with your restorative or orthodontic goals:
Dental implants: Immediate placement may be possible in select sites with healthy bone and no active infection. More commonly, a healing period of about 8 to 12 weeks or longer is recommended before implant placement, particularly after removing molar teeth.
Dentures: Immediate dentures can be placed on the day of extraction or after healing. Expect adjustments as the gums and bone remodel around each removed tooth site.
Orthodontics: Tooth movement typically resumes after soft tissue healing and completion of space-creating extractions, often within a few weeks.
If you are considering multiple dental extractions at once, discuss exactly how many teeth can be extracted at once in your situation and whether removing molar teeth changes the timing of implants, dentures, or braces.
What to Expect During the Procedure
Your team will review anesthesia options to match your needs. Local anesthesia numbs the treatment area. Nitrous oxide offers relaxation with rapid recovery. Oral sedation helps reduce anxiety. IV sedation or general anesthesia may be used for extensive or surgical cases. With adequate anesthesia, you should feel pressure but not sharp pain.
A multiple-extraction visit typically includes:
Preoperative review and updated imaging
Administration of anesthesia or sedation with continuous monitoring
Atraumatic loosening and removal of teeth using instruments or minor surgical techniques, including special steps when removing molar teeth
Socket care, including cleaning, smoothing bone, and placing grafts if planned
Bleeding control with gauze pressure, sutures, and hemostatic agents
Placement and adjustment of an immediate denture or provisional when indicated
Immediate risks are usually low and managed during the visit. Your team will control bleeding, provide tailored pain relief guidance, and review written instructions and emergency contact details. Temporary numbness, nausea related to sedation, or soft tissue irritation can occur after a removed tooth or when several teeth are taken out together.
Aftercare, Recovery, and When to Seek Help
For the first 24 to 48 hours, here is what to do after teeth removal to support clot formation and comfort:
Bite gently but firmly on gauze for 30 to 60 minutes to control bleeding, replacing as directed.
Keep your head elevated and apply cold packs on the face in 15-minute intervals during the first day to limit swelling.
Avoid spitting, drinking through straws, or smoking to protect the blood clots and reduce dry socket risk.
Choose soft, cool foods such as yogurt, eggs, mashed potatoes, and spooned smoothies.
Resume gentle brushing the night of surgery, avoiding the sockets. Begin warm saltwater rinses after 24 hours, 3 to 4 times daily.
Pain control often involves alternating acetaminophen with an anti-inflammatory as instructed. Take prescribed antibiotics exactly as directed if they are provided. If you had sedation, arrange a ride home and avoid driving, alcohol, strenuous activity, and legal decisions for at least 24 hours. Keep following your clinician’s guidance on what to do after teeth removal as healing progresses.
Typical recovery includes mild to moderate soreness for 2 to 3 days and swelling that peaks around 48 to 72 hours. Contact your provider promptly if you experience any of the following:
Bleeding that continues to soak gauze for more than two hours despite firm pressure
Severe or worsening pain after day 3, which may indicate dry socket
Fever over 100.4°F, a foul taste, or increasing swelling that could suggest infection
Persistent numbness, or difficulty swallowing or breathing
Most soft tissue healing occurs within two weeks, while bone remodeling continues over several months. Follow-up visits allow your provider to monitor healing, remove sutures if needed, and adjust dentures or retainers. Implant planning typically begins around the two-week check and proceeds when bone and soft tissues are ready. If orthodontic treatment is part of your plan, timing will be coordinated so tooth movement resumes safely and efficiently after any removed tooth sites have stabilized.
Preprosthetic care prepares your mouth for a stable, comfortable prosthesis, whether that is a denture, an implant-supported restoration, or another appliance. By reshaping bone and soft tissue, oral pre-prosthetic surgery improves fit, function, and long-term success. Below is what to know about pre-prosthetic surgery, what to expect, how to plan, and why timing matters.
When and Why Pre-Prosthetic Surgery Is Needed
Pre-prosthetic surgery is recommended when oral tissues need to be optimized before placing dentures, partials, or dental implants. The aim is to create a smooth, well-contoured foundation so your prosthesis seats properly, feels comfortable, and stays stable during chewing and speaking. Understanding what to know about pre-prosthetic surgery helps set expectations and supports better outcomes.
Common reasons include preparing for complete or partial dentures, improving the ridge for implant placement, and correcting areas that cause sore spots or instability under a prosthesis. After tooth loss, bone resorption can leave sharp edges, undercuts, or irregular ridges. Soft tissue concerns such as high frenum attachments, shallow vestibules, or mobile tissues can interfere with denture seal and stability or complicate hygiene around implants. In many cases, pre-prosthetic surgery procedures address both bone and soft tissue issues at the same visit.
Timing depends on overall health, healing capacity, and oral hygiene. Medical factors like diabetes control, blood thinners, osteoporosis medications, and tobacco use can influence scheduling and approach. Your clinician will also consider recent extractions, any infections, and the timeline for delivering your prosthesis so healing is complete before final impressions. This planning phase is a key part of oral pre-prosthetic surgery.
Types of Pre-Prosthetic Procedures and What to Expect
Several routine pre-prosthetic surgery procedures may be used alone or in combination to create the best foundation:
Alveoloplasty: Smooths and reshapes the jawbone after extractions or to refine irregular ridges.
Ridge augmentation: Adds bone or bone substitutes where volume is insufficient for implant placement or to improve denture support.
Frenectomy: Releases a tight lip or tongue frenum that can dislodge a denture or cause tissue pull.
Vestibuloplasty: Deepens the space between the lips or cheeks and gums to enhance denture retention and hygiene access.
Most procedures are performed with local anesthesia; oral or IV sedation may be offered for comfort depending on complexity and preference. During preprosthetic surgery, the provider carefully incises and reflects the tissue, contours bone as needed, adjusts soft tissue attachments, and places sutures for optimal healing.
Benefits include improved fit, fewer sore spots, better retention, and more predictable outcomes for implants or dentures. Risks are generally low but can include temporary swelling, bruising, discomfort, bleeding, infection, changes in sensation, or the need for additional procedures if healing or bone volume is limited. As with all pre-prosthetic surgery procedures, individualized assessment guides the safest, most effective plan.
Recovery is typically straightforward. Many patients resume normal activities within 24 to 72 hours, with soft tissue healing in about 2 to 3 weeks. Bone grafts and ridge augmentation may require several months to mature before implant placement or final denture fabrication. Post-operative care usually includes cold compresses for the first 24 hours, prescribed or over-the-counter pain control, saltwater or antimicrobial rinses as directed, a soft diet, and avoiding straws, smoking, and vigorous activity. Keep the area clean with gentle brushing around the surgical site, follow suture care instructions, and attend all follow-up visits after oral pre-prosthetic surgery.
Planning, Outcomes, and Working With Your Dental Team
Successful care starts with a detailed evaluation. Your team will complete a clinical exam, review your medical history, and obtain imaging such as panoramic X-rays or CBCT scans to assess bone height, width, density, sinus position, nerve location, and soft tissue anatomy. Digital models and bite records help plan the surgical approach and coordinate with your future prosthesis, ensuring that preprosthetic steps align with restorative goals.
By correcting ridge irregularities and soft tissue issues, pre-prosthetic surgery improves denture fit and stability, enhances comfort, reduces sore spots, and supports clearer speech and stronger chewing efficiency. For implants, proper ridge preparation can increase primary stability, reduce complications, and improve long-term implant survival and hygiene access. These are core outcomes to consider when reviewing what to know about pre-prosthetic surgery.
Consider asking your oral surgeon or prosthodontist:
Which pre-prosthetic surgery procedures do I need and why?
What are my anesthesia or sedation options?
How long is healing before impressions or implant placement?
What risks or limitations apply in my case?
How will this affect the look, feel, and maintenance of my dentures or implants?
Are there non-surgical alternatives and how do they compare?
If you are considering dentures or implants and want to optimize your outcome, schedule a consultation with a qualified provider to create a tailored plan for oral pre-prosthetic surgery and guide you through each step of preprosthetic care.