Orthognathic (corrective jaw) surgery repositions the jaws to improve bite function, facial balance, and airway health. Understanding orthognathic surgery expectations before, during, and after surgery helps you prepare confidently and recover smoothly. This guide covers candidacy, planning and imaging, the hospital experience, recovery milestones, and long-term outcomes so you can make informed decisions with your care team.
Understanding Orthognathic Surgery
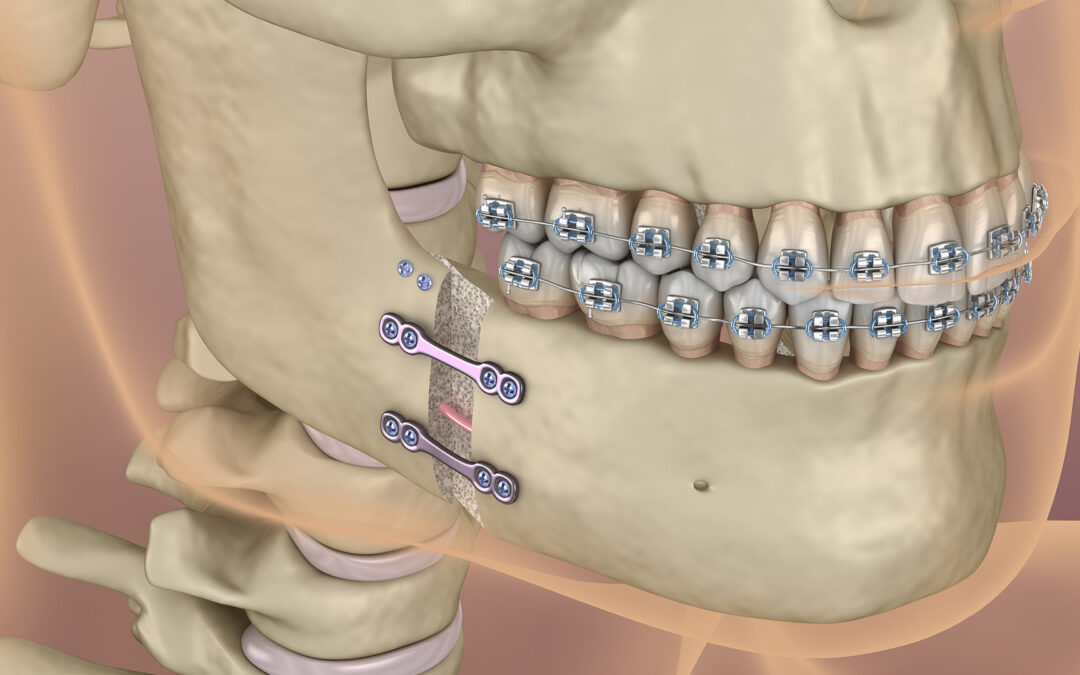
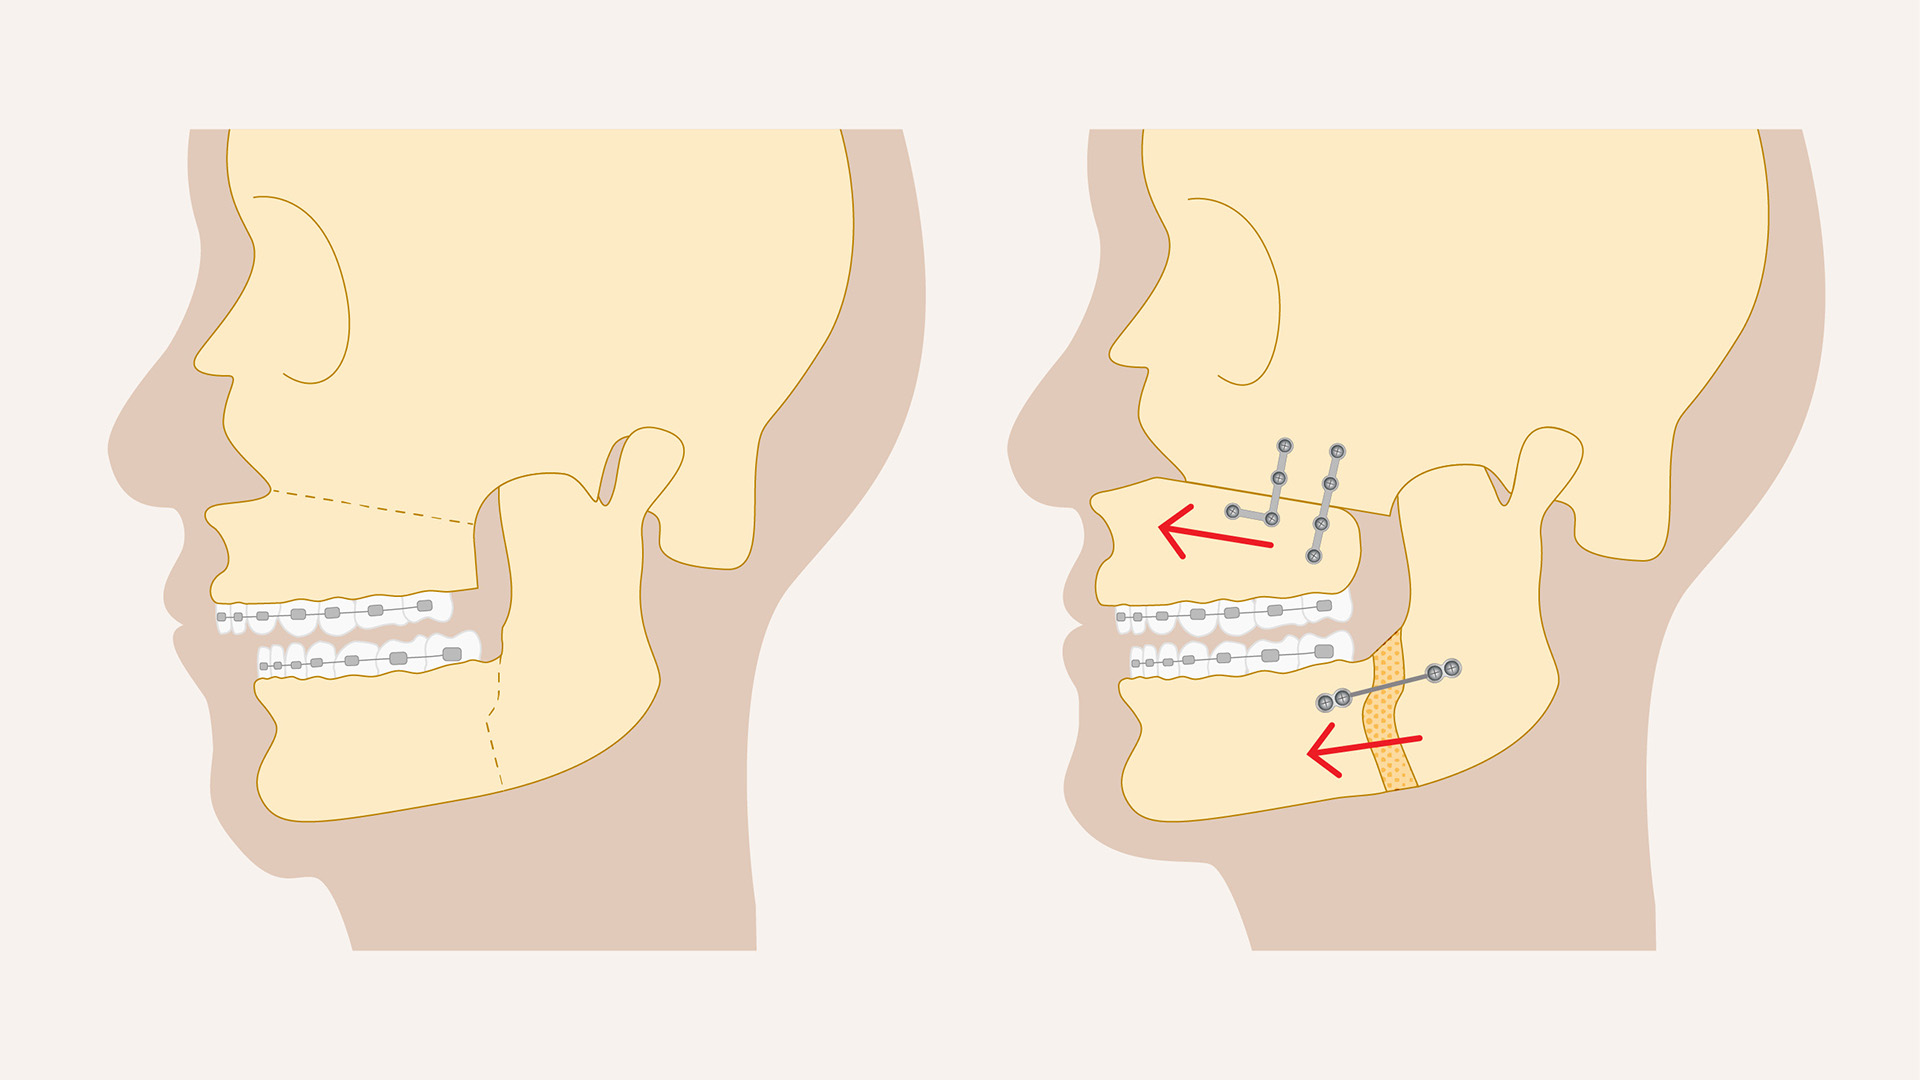
Orthognathic surgery is performed by an oral and maxillofacial surgeon to reposition the upper jaw (maxilla), lower jaw (mandible), or both. It is recommended when jaw size or position cannot be corrected with braces alone. Good candidates are teens and adults with near-complete or completed growth who have functional concerns such as difficulty chewing, speaking, or breathing, or noticeable facial imbalance.
Conditions commonly treated include underbite, overbite, open bite, crossbite, facial asymmetry, a recessed chin or midface, and obstructive sleep apnea related to jaw position. In some cases, it may help address bite issues associated with TMJ disorders when coordinated with appropriate therapies.
The goals are to create a stable, healthy bite, enhance facial harmony, and improve breathing. Benefits often include easier chewing and speaking, improved smile aesthetics, better airway function (especially during sleep), reduced tooth wear, and long-term oral health stability when combined with orthodontic treatment.
Preparing for Surgery: Preoperative Expectations
Most patients complete a period of pre-surgical orthodontics to position the teeth optimally on each jaw. Your orthodontist and surgeon will coordinate the sequence of tooth movement and surgical timing. This collaboration helps ensure a stable final bite and supports your aesthetic goals while aligning with realistic orthognathic surgery expectations.
Your evaluation may include a physical exam, dental scans or impressions, X-rays, CBCT imaging, photographs, and digital models. Many teams use virtual surgical planning with 3D-printed guides or splints to enhance precision. You will review the plan, including risks, benefits, and alternatives, and provide informed consent after your questions are answered.
Plan ahead at home and work. Most people need one to two weeks away from school or desk work, with a longer timeline for physically demanding jobs. Arrange help with transportation, meals, and errands for the first several days. Prepare recovery supplies such as cold packs, a blender, protein shakes, soft foods, lip balm, a humidifier, prescribed medications, a water flosser, and wax or silicone for braces. Create a comfortable resting area with extra pillows to keep your head elevated. Confirm insurance authorization and complete any necessary time-off paperwork.
The Day of Surgery and Hospital Experience
On the day of surgery, you will check in, review the treatment plan, and meet the anesthesia team. Most procedures are performed under general anesthesia. After you are asleep, the surgeon makes incisions inside the mouth, repositions the jawbones, and secures them with small plates and screws. Incisions are closed with dissolvable sutures, and elastics may be placed to guide your new bite.
Procedure time varies by complexity. One-jaw surgery often takes two to four hours, while double jaw orthognathic surgery may take four to six hours. Afterward, you will recover in a monitored area where your breathing, heart rate, and comfort are observed closely. Some patients go home the same day; others stay one night for observation.
Upon waking, expect facial swelling, a sense of fullness or congestion, and temporary numbness in the lips or cheeks. Your bite will feel different. Pain is typically manageable with prescribed medications and cold therapy. Nurses will help you start fluids and review how to use elastics, oral rinses, and cold compresses. The first 24 hours focus on rest, hydration, cold packs, head elevation, and gentle oral care with prescribed rinses.
Recovery Timeline and Common Postoperative Issues
Recovery is a gradual process. While everyone heals at a different pace, these milestones are common:
First week: Swelling and bruising usually peak around days two to three, then begin to subside. Stick to liquids and very soft foods. Keep your head elevated and use cold packs as directed. Most people can speak softly, move around the house, and do light activities.
Weeks 2–6: Transition from liquids to soft foods with your surgeon’s approval. Swelling gradually decreases and energy improves. You will attend orthodontic and surgical follow-ups to adjust elastics and monitor healing.
Months 3–6: Most swelling resolves, strength returns, and normal chewing gradually resumes as cleared by your surgeon. This phase is particularly meaningful for those who underwent double jaw orthognathic surgery, as muscular adaptation continues.
One year: Final refinement of your bite and smile with orthodontic finishing and retainer wear. Results continue to mature as tissues settle.
Common postoperative symptoms include swelling, bruising, nasal congestion (especially after upper jaw surgery), mild bleeding from the nose or mouth, and temporary numbness or tingling in the lips or cheeks. Nerve sensation often improves over weeks to months. Pain is typically moderate and well controlled with medications and consistent icing and elevation.
Know the warning signs that require prompt attention: a fever over 101.5°F that does not respond to medication, increasing facial pain or swelling after initial improvement, foul-tasting drainage, difficulty breathing, inability to keep fluids down, uncontrolled bleeding, or irritation over hardware. Contact your surgeon immediately if any of these occur.
Your team will schedule regular orthodontic visits to guide your bite into its final position. Plan a gradual return to normal eating: clear liquids, full liquids, purees, then soft foods such as eggs, pasta, fish, and cooked vegetables before moving back to regular textures. Avoid hard, crunchy, or chewy foods until you are cleared. Light walking is encouraged early. More strenuous exercise and contact sports should wait until your surgeon confirms bone healing, typically six to eight weeks or longer depending on the procedure.
Setting Realistic Orthognathic Surgery Expectations
Clear communication with your care team helps align orthognathic surgery expectations with your goals. Discuss functional priorities like chewing and airway, as well as aesthetic preferences. Ask about the anticipated amount of swelling, how long elastics or splints will be used, and expected timelines for returning to work, school, and exercise. Patients undergoing double jaw orthognathic surgery may experience slightly longer swelling and dietary restrictions, but many also report more comprehensive improvements in facial balance and bite stability.
It is normal to have questions about sensation changes, including numbness or tingling, especially in the lower lip and chin. Most changes improve over time, though some residual numbness can persist. Your surgeon will explain risks, how nerves are protected, and what you can do to support recovery.
Long-Term Outcomes and Patient Expectations
Final results unfold as swelling resolves and orthodontic finishing is completed. Most patients achieve a more stable bite, improved chewing efficiency, enhanced facial balance, and, when indicated, better sleep and breathing. Scars are hidden inside the mouth. The small plates and screws usually remain in place permanently unless there is a specific reason to remove them.
Maintaining oral health supports long-term stability. Brush gently with a soft toothbrush and use a water flosser around braces and surgical areas once approved. Wear elastics and retainers exactly as prescribed. Keep all follow-up appointments so your team can monitor healing, adjust your bite, and address concerns early. Contact your surgeon promptly if you notice new or worsening pain, bite changes, signs of infection, or if elastics or splints come loose.
Emotional adjustment is part of the process. Swelling can temporarily change your appearance, and numbness can feel unfamiliar. Many patients find that taking progress photos, following care instructions, and leaning on supportive friends and family helps. If you feel anxious or discouraged, ask your team about support groups or counseling resources.
Tips for a smooth recovery:
Stay hydrated and well nourished with protein-rich soft foods.
Sleep with your head elevated for the first couple of weeks.
Use cold compresses initially, then warm compresses as directed.
Avoid tobacco and vaping to support healing.
Follow medication schedules and activity guidelines closely.
With careful planning, consistent follow-up, and teamwork between your orthodontist and surgeon, most patients experience long-lasting functional and aesthetic improvements from orthognathic surgery. Understanding orthognathic surgery expectations ahead of time, particularly for double jaw orthognathic surgery, can make the journey smoother and the results more predictable.
Dental implants have an excellent long-term success rate, but complications can occur, especially without careful planning and maintenance. Knowing the most common problems with dental implants, how they start, what to watch for, and how they are treated, helps you protect your investment and oral health. Below, we outline early and late complications with dental implants, nerve and sinus concerns, patient risk factors, key warning signs, and proven solutions to keep implants healthy for the long term. We also address frequently reported side effects of dental implants and tooth implantation side effects so you know what is expected versus what needs attention.
Early Surgical and Healing Complications
During the first few days to weeks after placement, the implant site is actively healing. Mild soreness and swelling are typical tooth implantation side effects and usually resolve quickly. Early complications with dental implants usually relate to infection control, bleeding, and establishing stable osseointegration (fusion between implant and bone). Being aware of early dental implants problems allows you to act promptly if symptoms worsen.
Post-operative infection arises when bacteria enter the surgical site before the tissue seals. Contributing factors include inadequate plaque control, smoking, unmanaged systemic conditions, and contamination during home care. Signs include increasing pain after initial improvement, swelling that worsens after day three, warmth, redness, bad taste, or discharge. Prompt evaluation allows for targeted antibiotics, irrigation, and local care to prevent progression.
Bleeding and swelling are common immediately after surgery. Some swelling and oozing are expected side effects of dental implants, but persistent bleeding beyond 24 hours or rapidly expanding swelling needs attention. Firm bite pressure on gauze, cold compresses, rest, and avoiding strenuous activity usually control mild issues. In some cases, medication adjustments or additional suturing may be required.
Poor osseointegration occurs when the implant does not fuse with bone. Risk factors include early overloading (chewing hard foods too soon), infection, insufficient primary stability, smoking, and systemic health problems. Patients may notice persistent discomfort or a lack of functional improvement, while clinicians may detect mobility at follow-up.
Wound dehiscence refers to reopening of the incision or soft tissue over the implant. Causes include suture tension, thin or fragile tissue, trauma, and poor oral hygiene. Management may involve protective dressings, refined home care, additional suturing, or soft tissue grafting to ensure coverage.
Early implant mobility is a warning sign. Any movement in the first weeks typically indicates inadequate stability or failed integration. Your clinician may reduce loading (remove temporary crowns), adjust your bite, or remove and replace the implant after healing, depending on timing and severity.
Late-Onset Implant Problems
After initial healing, implants function much like natural teeth. However, complications with dental implants can develop months or years later, often involving inflammation around the implant, mechanical issues, or gradual changes to bone and gum tissues. These dental implants problems are usually manageable when caught early.
Peri-implantitis and mucositis: Peri-implant mucositis is gum inflammation without bone loss. If unmanaged, it can progress to peri-implantitis, a chronic infection with bone loss around the implant. Risk factors include poor oral hygiene, smoking, a history of periodontal disease, and inconsistent professional maintenance. Symptoms may include bleeding on brushing, swelling, persistent bad taste, pus, or deepening pockets around the implant.
Mechanical loosening and fractures: Late mobility often stems from prosthetic component issues such as a loose or fractured abutment screw, cracked porcelain, chipped crowns, or worn attachments. You may notice clicking, movement while chewing, or a change in your bite. Early evaluation can prevent minor problems from becoming structural failures.
Bone loss and gum recession can develop gradually. Contributing factors include peri-implantitis, thin gum biotype, aggressive brushing, poorly contoured restorations, or biomechanical overload from grinding. Signs include longer-looking crowns, visible metal margins, or food impaction. Timely intervention, such as bite adjustments, soft tissue grafting, and improved plaque control, can preserve stability.
Nerve, Sinus, and Soft-Tissue Considerations
Nerve-related issues are more common in the lower jaw, where the inferior alveolar and mental nerves run. Symptoms include numbness, tingling, burning, or shooting pain in the lip, chin, or tongue. Prevention depends on precise imaging, meticulous planning, and guided surgery to maintain safe distances from nerve pathways. If symptoms occur, immediate evaluation is essential. Early steps, such as relieving pressure, removing an offending implant, or prescribing medications, can improve the chances of recovery.
Sinus complications may occur with upper jaw implants near the maxillary sinus. Signs include persistent one-sided nasal congestion, sinus pressure, a whistling sound or air passage through the implant site, drainage, or recurrent sinus infections. Prevention includes pre-surgical imaging, sinus lift or grafting when needed, and atraumatic surgical techniques. If problems develop, management may involve antibiotics, decongestants, closing any sinus communication, or referral to an ENT specialist for persistent cases.
Soft-tissue irritation around implants can present as redness, tenderness, or bleeding when brushing. Causes include plaque buildup, ill-contoured restorations, or rough material surfaces. Mucosal overgrowth can trap debris and fuel inflammation; contour refinement or adjusting the crown often resolves the issue. True titanium allergies are rare, but sensitivities to certain components or surface contaminants can occur. Evaluation may include allergy history and clinical testing, and in select cases, considering alternative materials such as zirconia.
Patient and Lifestyle Factors That Increase Risk
Identifying and managing patient-specific risks before and after surgery significantly improves outcomes. Daily habits, systemic health, bone quality, and bite forces all influence long-term success and the likelihood of common problems with dental implants.
Oral hygiene: Inadequate plaque control triggers inflammation and peri-implant disease. Consistent home care, twice-daily brushing, cleaning between teeth with floss or interdental brushes, and using antimicrobial rinses as directed, reduces risk.
Tobacco use: Smoking and other tobacco products impair blood flow, slow healing, and increase infection and bone loss. Quitting before surgery and staying tobacco-free afterward is one of the best ways to protect an implant.
Systemic conditions: Diabetes, osteoporosis, and immune disorders can affect healing and infection control. Well-controlled diabetes has significantly better outcomes than uncontrolled disease. Some medications, including bisphosphonates or other antiresorptives, immunosuppressants, and certain chemotherapy agents, require careful planning with your physician. Always share a complete medical and medication history with your dental team.
Bone quality and volume: Insufficient density or volume may require bone grafting or sinus augmentation to achieve stability and long-term support.
Bruxism and clenching: Excessive forces from grinding can loosen screws, crack porcelain, or contribute to bone loss. Nightguards or occlusal splints, bite adjustments, and stress management help protect implants and natural teeth.
Signs, Symptoms, and When to Seek Help
Early recognition leads to simpler, more successful treatment. Pay attention to changes, even minor ones, and reach out promptly. Distinguish expected tooth implantation side effects like mild soreness from warning signs that indicate complications with dental implants.
Common warning signs
Pain that persists or worsens after the first few days post-surgery
Swelling that does not subside, redness, or warmth
Bleeding on brushing, pus, or an unpleasant taste
Mobility of the implant or crown, or clicking sensations
Bite changes or a crown that feels loose
Numbness or tingling of the lip, chin, or tongue
Sinus pressure, congestion, or drainage after upper jaw surgery
Timing matters
Early (first 2–6 weeks): Persistent pain, swelling, or early mobility often point to infection, inadequate stability, or wound problems.
Late (months to years): Bleeding on brushing, bad taste, gum recession, or intermittent swelling suggest peri-implant mucositis or peri-implantitis. Sudden clicking or movement typically indicates a loose component or screw.
Contact your dental team right away if you experience ongoing pain beyond a few days, persistent swelling, fever, pus, numbness or tingling, bleeding that will not stop, sinus symptoms after upper jaw surgery, or any mobility in the implant or crown. Most dental implants problems are easier to resolve when addressed early, and your provider can triage by phone to determine if urgent in-office care is needed.
Treatment Options, Prevention, and Long-Term Care
Effective care starts with an accurate diagnosis. Your provider will evaluate the implant, surrounding gums, bone levels, and all prosthetic components to determine whether the issue is inflammatory, mechanical, or both. Treatment plans often combine non-surgical therapy with surgical or restorative solutions for best results. Clear guidance helps separate normal side effects of dental implants from treatable complications with dental implants.
Non-surgical treatments
Targeted antibiotics when infection is present
Antiseptic rinses such as chlorhexidine
Professional debridement to remove plaque and calculus from implant surfaces
Bite adjustments to reduce excessive forces
For mechanical issues, tightening or replacing screws, re-cementing crowns, or repairing chipped porcelain
Surgical interventions
Flap surgery to access and decontaminate implant surfaces
Removal of a failing implant when necessary, with planning for future replacement
Maintenance and prevention
Maintenance is the foundation of long-term success and the best defense against common problems with dental implants. Schedule regular professional cleanings and exams based on your risk level, often every three to four months for higher-risk patients. At home, brush twice daily with a soft-bristled brush, clean between teeth and around the implant crown with floss or interdental brushes, and use water flossers when helpful. For grinders, a custom nightguard can protect both implants and opposing teeth. Address minor chips or looseness promptly to prevent larger problems.
If an implant fails
Your dentist will determine whether the implant can be salvaged. Early problems may respond to thorough decontamination and bone or soft tissue grafting. If removal is required, options include immediate replacement in select cases, delayed replacement after healing, or alternative prosthetic solutions such as bridges or partial dentures. Prognosis depends on the cause of failure, bone quality, and how well risk factors are controlled. Many patients achieve successful replacement implants after corrective treatment and improved maintenance.
With careful planning, excellent home care, and consistent professional follow-up, most dental implants problems are preventable or manageable. If you notice any changes or have concerns about your implant, contact your dental team for a personalized assessment and care plan.
Quick Reference: Common Implant Problems and Solutions
Issue
Typical Signs
Contributing Factors
Common Solutions
Early infection
Increasing pain, swelling, redness, discharge
Plaque accumulation, smoking, poor hygiene
Antibiotics, irrigation, local care, improved home care
Immediate evaluation, pressure relief, possible removal, meds
Sinus complications
Congestion, drainage, whistling sound
Sinus membrane breach, infection
Antibiotics, decongestants, closure, ENT referral if persistent
Remember: while some side effects of dental implants such as transient soreness and swelling are expected, persistent or worsening symptoms point to complications with dental implants that deserve prompt care. Understanding the common problems with dental implants equips you to take preventive steps and seek timely treatment if needed.
Impacted canines are common and highly treatable with coordinated orthodontic and surgical care. When an upper canine doesn’t erupt on schedule or follows an incorrect path, a tailored plan can guide it into the proper place, protect nearby teeth, and restore a healthy, confident smile. Below is a clear overview of what impacted canines are, how they’re evaluated, and what to expect from treatment through recovery, an outline that helps you understand what to expect when getting treatment for impacted canines.
Understanding Impacted Canines
An impacted canine is a permanent canine tooth that doesn’t erupt into the dental arch at the expected time or follows an abnormal route. Instead of emerging between the lateral incisor and first premolar, it may be trapped in the palate or gum, tipped toward neighboring roots, or blocked by crowding.
Signs can include delayed eruption compared with the opposite side, a retained baby canine, asymmetry in the smile, crowding or spacing around the canine area, tenderness or pressure in the upper arch, and occasionally a small bulge on the palate or gum. Some people have no symptoms, and the issue is discovered on routine X-rays.
Contributing factors include genetics, lack of space due to crowding, ectopic eruption (an abnormal path), retained or ankylosed baby teeth, early loss of baby teeth that allows adjacent teeth to drift, and growth patterns that narrow the upper jaw. Impacted canines occur most often in the upper arch and may affect one or both sides. Understanding these factors is part of what to expect when getting treatment for impacted canines, because they influence the plan and timeline.
Diagnosis and Advanced Evaluation
Your orthodontist starts with a comprehensive clinical exam, reviewing your dental and medical history, eruption timing, facial growth and symmetry, and the bite. They will look for retained baby teeth, palpate the upper lip and palate to feel for canine bulges, assess gum health, and measure space. Photos and impressions or a 3D digital scan may be taken to document your baseline.
Imaging is crucial for locating the impacted tooth and safeguarding adjacent roots. Panoramic and periapical X-rays provide an overview of position and root development. When greater detail is needed, a cone beam CT (CBCT) scan helps pinpoint the tooth’s exact location and angulation, its relation to adjacent roots and nerves, bone thickness, and any cysts or root resorption. Your orthodontist will recommend 3D imaging when it meaningfully informs the treatment plan while keeping radiation exposure appropriate.
Timing is important. Growth and dental development influence whether interceptive steps, such as removing a baby canine or expanding the palate, will help, or whether surgical exposure is required. Assessment in the early teen years can simplify care, but adults can be treated successfully as well. The stage of root formation, space availability, and overall orthodontic goals guide the sequencing of treatment.
Treatment Options and the Typical Care Pathway
Treatment ranges from non-surgical approaches to surgical exposure, depending on the tooth’s position and your age. Non-surgical options may include removing the baby canine to encourage eruption, creating space with braces or expanders, and monitoring with periodic imaging if eruption appears likely. If the canine is unlikely to erupt on its own or threatens neighboring roots, surgical exposure is recommended so the orthodontist can apply gentle traction to bring it into place.
A typical pathway follows a sequence:
Orthodontic preparation: Braces or aligners are used to align the teeth and create space for the canine.
Exposure and bonding: An oral surgeon uncovers the impacted tooth and bonds a small bracket or attaches a gold chain.
Guided eruption: The orthodontist connects the attachment to the braces and applies light, controlled forces to guide the canine into the arch.
Finishing: Once the tooth emerges, braces or aligners are used to refine tooth position, root angulation, and the bite for a stable outcome.
Timeframes vary. Many patients complete treatment in about 12 to 24 months, though complex cases can take longer. Typical milestones include space creation over a few months, surgical exposure and soft tissue healing within 1 to 2 weeks, initial movement of the canine appearing over 3 to 6 months, and final bite detailing over several additional months. Your orthodontist will outline the expected schedule for activations and progress checks so you know what to expect when getting treatment for impacted canines.
What to Expect During and After Exposure and Bonding
Exposure and bonding is a routine outpatient procedure. After reviewing your health history and imaging, the surgeon numbs the area with local anesthesia. Many patients choose nitrous oxide or IV sedation for added comfort. The surgeon makes a small opening in the gum to access the tooth, removes a minimal amount of tissue or bone if necessary, and bonds a bracket or attaches a gold chain to the canine. The site may be covered with a protective dressing or sutured to allow the tooth a clear path to erupt.
Immediately afterward, the focus is on comfort and protecting the site. Discomfort is usually mild to moderate and can be managed with over-the-counter pain relievers as directed; a prescription may be provided if needed. Apply cold packs intermittently for the first 24 to 48 hours to limit swelling. Choose soft foods such as yogurt, eggs, pasta, and smoothies for several days. Keep the area clean by gently rinsing with saltwater or a prescribed antimicrobial rinse. Brush and floss other areas normally and clean around the surgical site as instructed. Avoid smoking or vaping, vigorous spitting, drinking through straws, and strenuous activity for several days to protect the blood clot and sutures.
Recovery is typically quick. Most people return to work or school within 1 to 3 days, and soft tissue healing occurs within 1 to 2 weeks. If a bracket or chain was placed, your orthodontist will manage it at follow-up visits. Complications are uncommon but can include infection, prolonged bleeding, detachment of the bonded attachment, delayed or failed eruption, or root resorption of adjacent teeth. Contact the office promptly if you develop fever, increasing or spreading swelling after day three, persistent severe pain, foul taste or drainage, uncontrolled bleeding, a loose chain or bracket, or numbness that doesn’t improve.
Coordinated Orthodontic Care and Ongoing Support
Successful outcomes rely on teamwork. Your orthodontist leads diagnosis, creates space, and guides movement of the canine. The oral and maxillofacial surgeon performs the exposure and bonding. You’ll attend orthodontic appointments every 4 to 8 weeks for adjustments and monitoring, plus surgical visits for the exposure and a brief post-op check. Clear communication ensures the timing of exposure matches orthodontic readiness and that forces applied to the canine remain light and safe for surrounding teeth.
Both braces and clear aligners can be used to guide an impacted canine. With braces, a power chain or elastic thread connects the impacted tooth’s attachment to the archwire and is adjusted gradually. With aligners, your orthodontist may place small fixed attachments and use auxiliary elastics in combination to control movement. Expect periodic wire changes, adjustments to the chain or bracket, or aligner refinements. Gentle, continuous forces are key to efficient movement and the protection of adjacent roots.
Thoughtful planning makes the process smoother. Consider asking about total treatment time, the likelihood of spontaneous eruption after removal of a baby canine, whether CBCT is recommended, anesthesia options for exposure, and the specific surgical approach. Review fees and insurance coverage for both the surgical and orthodontic components. Many plans include impacted tooth exposure under oral surgery benefits, while orthodontic coverage varies. If you’re scheduling around work or school, plan the procedure later in the week to allow a long weekend for recovery, arrange transportation if sedation is used, and request a work or school note if needed. Maintain excellent oral hygiene, follow dietary and activity instructions, and keep all follow-up appointments. If you grind your teeth, discuss a nightguard after treatment is complete to protect your results.
Frequently Asked Questions
Question
Short Answer
Is treatment always surgical?
No. Some canines erupt on their own after space is created or a baby tooth is removed. Surgery is recommended when eruption is unlikely or nearby roots are at risk.
Does exposure hurt?
You’ll be numb during the procedure, and many patients choose sedation. Soreness afterward is usually mild to moderate and manageable with pain relievers.
How long until the tooth appears?
Many canines begin to show within 3 to 6 months after exposure, with full alignment completed over additional months.
Can adults be treated?
Yes. While early evaluation can simplify care, adults can be treated successfully with coordinated orthodontic and surgical management.
Will this affect other teeth?
Your team carefully plans forces and monitors with imaging to protect adjacent roots and gum health throughout treatment.
Next Steps
If you’ve been told you have an impacted canine, or you suspect one due to delayed eruption or a retained baby tooth, schedule a consultation. With a thorough evaluation, modern imaging, and a coordinated plan, most impacted canines can be guided into a healthy position for a strong, balanced smile. Understanding what to expect when getting treatment for impacted canines helps you prepare for each step, from diagnosis to recovery, and supports confident decision-making.
Jaw bone grafting builds a stronger, more stable foundation for dental implants when natural bone is too thin or too soft to support them. If a graft has been recommended before implant placement, understanding what to know about jaw bone grafting for dental implants, why it is needed, how the procedure works, and what recovery involves can help you feel confident about your treatment plan and long-term results. Many patients hear terms like dental bone graft or bone graft for teeth and want clear, practical guidance on what to expect. This overview provides that context.
Overview: Why Jaw Bone Grafting Matters
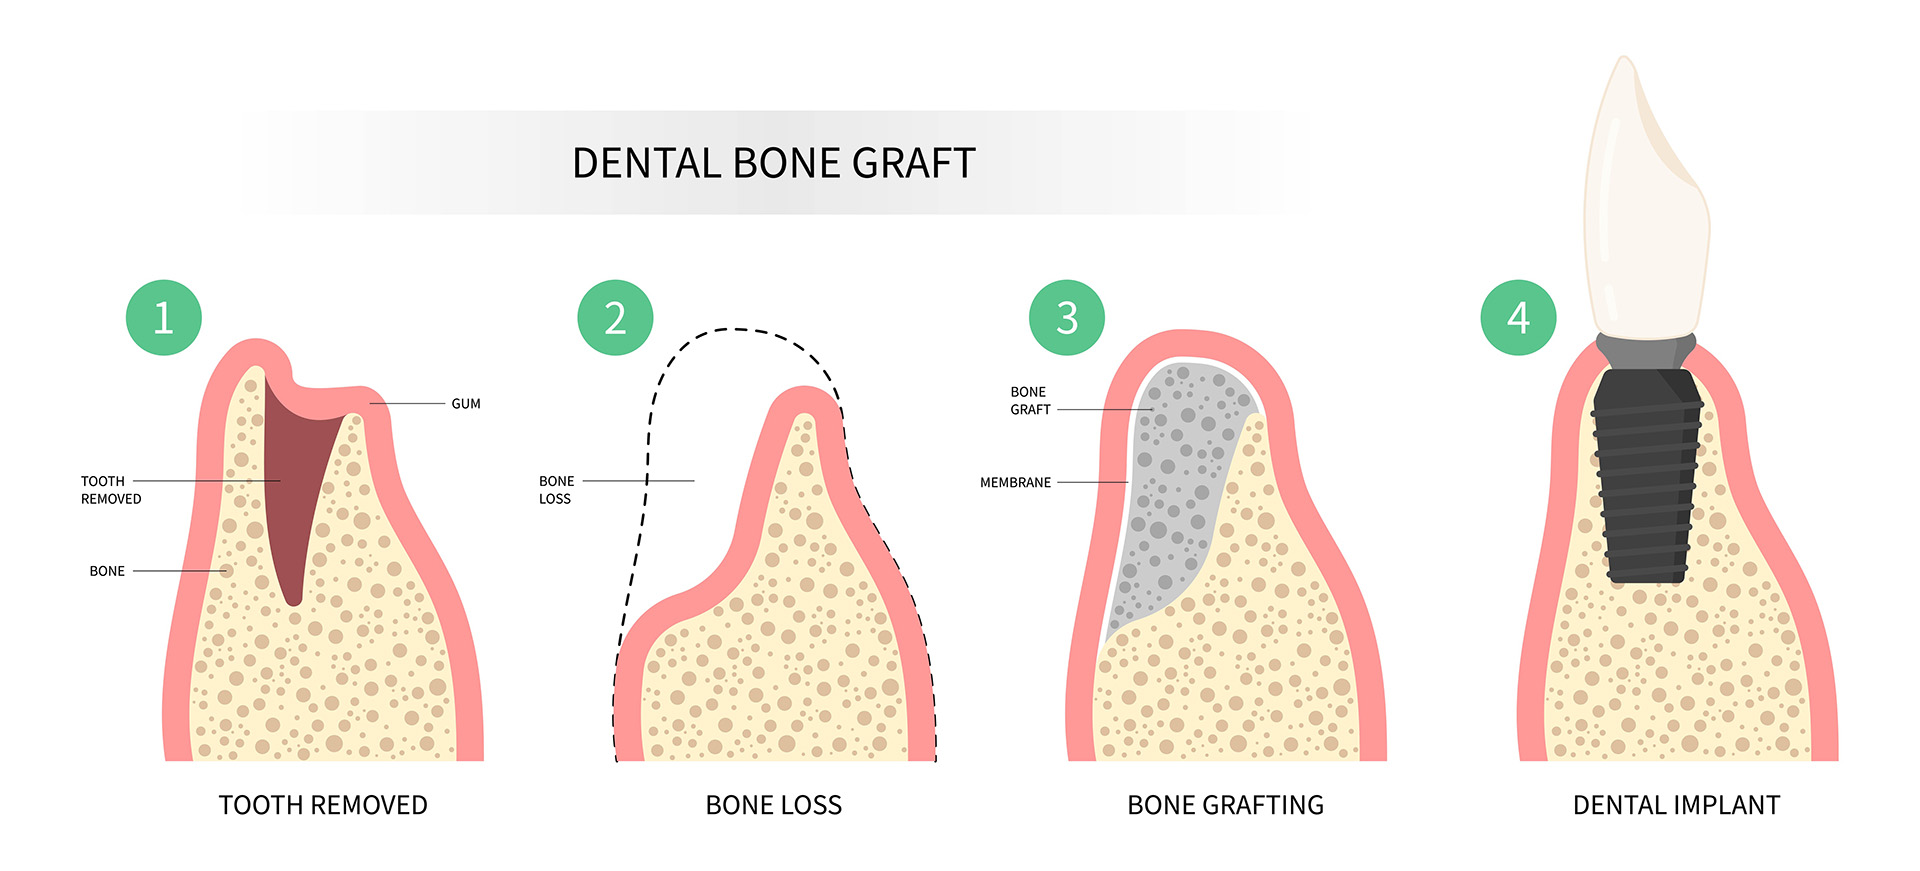
Bone grafting is a surgical procedure that adds or rebuilds the jawbone where it has thinned or resorbed. A healthy, adequately thick jawbone is essential for implants to integrate properly and remain stable over time. A dental bone graft replaces missing bone and stimulates your body to regenerate new bone tissue.
Grafting is often needed after tooth loss because the jawbone naturally shrinks without the stimulation of a tooth root. Other causes include periodontal disease, infections, long-standing extractions without replacement, traumatic injury, developmental conditions, and sinus pneumatization in the upper jaw. Smoking and certain medical conditions can also contribute to bone loss.
Rebuilding the jaw improves implant stability, appearance, and function. It can restore facial contours, support the gums to prevent gaps around the final crown, and create a balanced bite. With solid bone, the risk of implant complications is reduced and long-term chewing efficiency, speech, and smile aesthetics are better preserved. For patients asking what to know about jaw bone grafting for dental implants, one key point is that a bone graft for teeth often determines whether an implant can be placed predictably.
Types of Jaw Bone Grafts and Materials
Several graft materials are available, each with benefits depending on your needs:
Autografts use your own bone, often from the chin, jaw, or a nearby area. They offer excellent compatibility and healing potential but involve a second surgical site.
Allografts come from donated human bone that is rigorously processed and sterilized. They avoid a second surgical area and are widely used for socket preservation and ridge augmentation.
Xenografts, typically derived from bovine sources, act as a long-lasting scaffold that maintains volume while your bone grows in.
Synthetic grafts, such as calcium phosphate or bioactive glass, are lab-made materials designed to be safe, consistent, and supportive of bone growth.
Common techniques include sinus lifts, ridge augmentation, socket preservation, and block grafts:
Sinus lift is used in the upper back jaw when the sinus floor has expanded downward and vertical bone height is limited.
Ridge augmentation widens or increases the height of a thin jaw ridge to support implant placement.
Socket preservation places graft material into an extraction site immediately to maintain volume for a future implant.
Block grafts use a small, solid piece of bone to rebuild areas with significant defects.
Material choice and technique influence healing and timelines. Socket preservation may be ready for an implant in three to four months. Larger ridge augmentations or sinus lifts often require four to nine months before implant placement. Autografts tend to integrate quickly, while xenografts can maintain space longer but remodel more slowly. Your dentist will balance volume needs, healing expectations, and overall treatment goals to select the best approach for a dental bone graft. If you are considering a bone graft for teeth, ask about how the material affects the timing of implant placement.
Procedure, Preparation, and What to Expect
Your dentist will determine whether you need a graft using a clinical exam and a cone beam CT (CBCT) scan. The CBCT provides a three-dimensional view of bone volume, nerve locations, sinus anatomy, and any defects. Your medical history and medications are reviewed to reduce risks and support healing.
Before surgery, you will receive pre-op instructions that may include fasting if deeper sedation is planned, adjusting certain medications under your physician’s guidance, and arranging a ride home. Anesthesia options range from local anesthesia with or without oral sedation to IV sedation, depending on the procedure and your comfort preferences.
During the procedure, the area is numbed and a small incision is made to access the jawbone. The dentist places graft material where needed, sometimes adding a collagen membrane to protect the graft and guide bone regeneration. The site is then sutured. In some cases, a small implant can be placed at the same time as the graft. Many patients will heal first and return for implant placement after three to nine months, depending on the graft type and location. This sequence is common for a bone graft for teeth and is a central part of what to know about jaw bone grafting for dental implants.
Immediately after surgery, expect minor bleeding, swelling, and mild to moderate tenderness. You will receive instructions for cold compresses, prescriptions for pain control and antibiotics if indicated, and guidance on keeping the area clean without disturbing the graft. Most people resume normal daily activities within a day or two while avoiding strenuous exercise for several days.
Risks, Recovery, and Long-Term Outlook
Complications are uncommon when treatment is well planned and carefully performed. Potential issues include infection, graft exposure or failure, and delayed healing. With sinus lift procedures in the upper jaw, sinus membrane tears, congestion, or temporary sinus symptoms may occur and are typically managed with careful repair, medication, and follow-up. Prompt communication with your dentist helps resolve concerns early.
Most patients experience a predictable recovery. Swelling usually peaks at 48 to 72 hours and then subsides. Pain is generally manageable with over-the-counter medication or a short course of prescription analgesics. A soft diet and avoiding chewing on the grafted area protect the site as it stabilizes. You will be asked to avoid smoking and to use special rinses or gentle brushing techniques to keep the area clean without disturbing sutures or membranes. Follow-up visits are scheduled to monitor healing, remove sutures if needed, and plan the timing for implant placement.
Bone graft and implant success rates are high when patients are carefully selected and follow instructions. Factors that influence long-term outcomes include overall health, diabetes control, tobacco use, oral hygiene, bite forces, and attending regular dental checkups. To support healing, follow your medication plan, maintain excellent home care, eat a nutrient-dense diet with adequate protein, stay hydrated, and avoid pressure on the grafted site. With thoughtful planning and care, a dental bone graft can set the stage for implants that look, feel, and function like natural teeth for many years. If you are gathering what to know about jaw bone grafting for dental implants, remember that early evaluation and a customized plan improve the predictability of a bone graft for teeth and the final implant outcome.
If you are weighing options to replace missing teeth, dental implants and traditional dentures are likely at the top of your list. Both restore your smile, but implants often deliver a more secure, natural, and long-lasting result. Understanding why dental implants are better than dentures, and how each option affects comfort, function, and oral health, can help you make a confident choice.
Understanding Dental Implants and Dentures
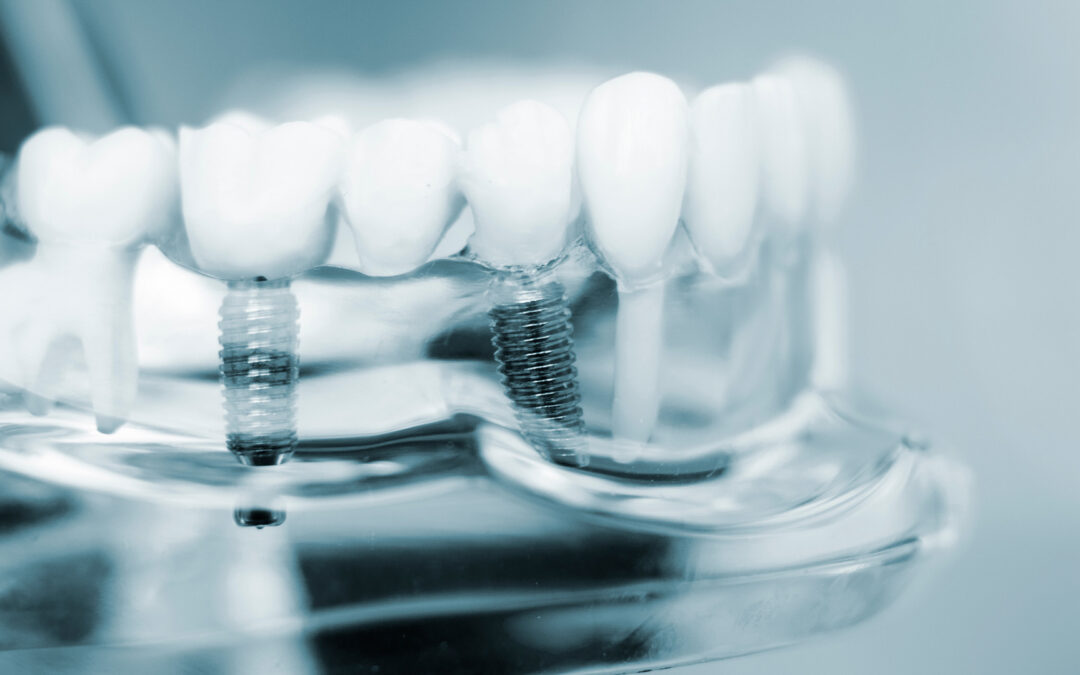
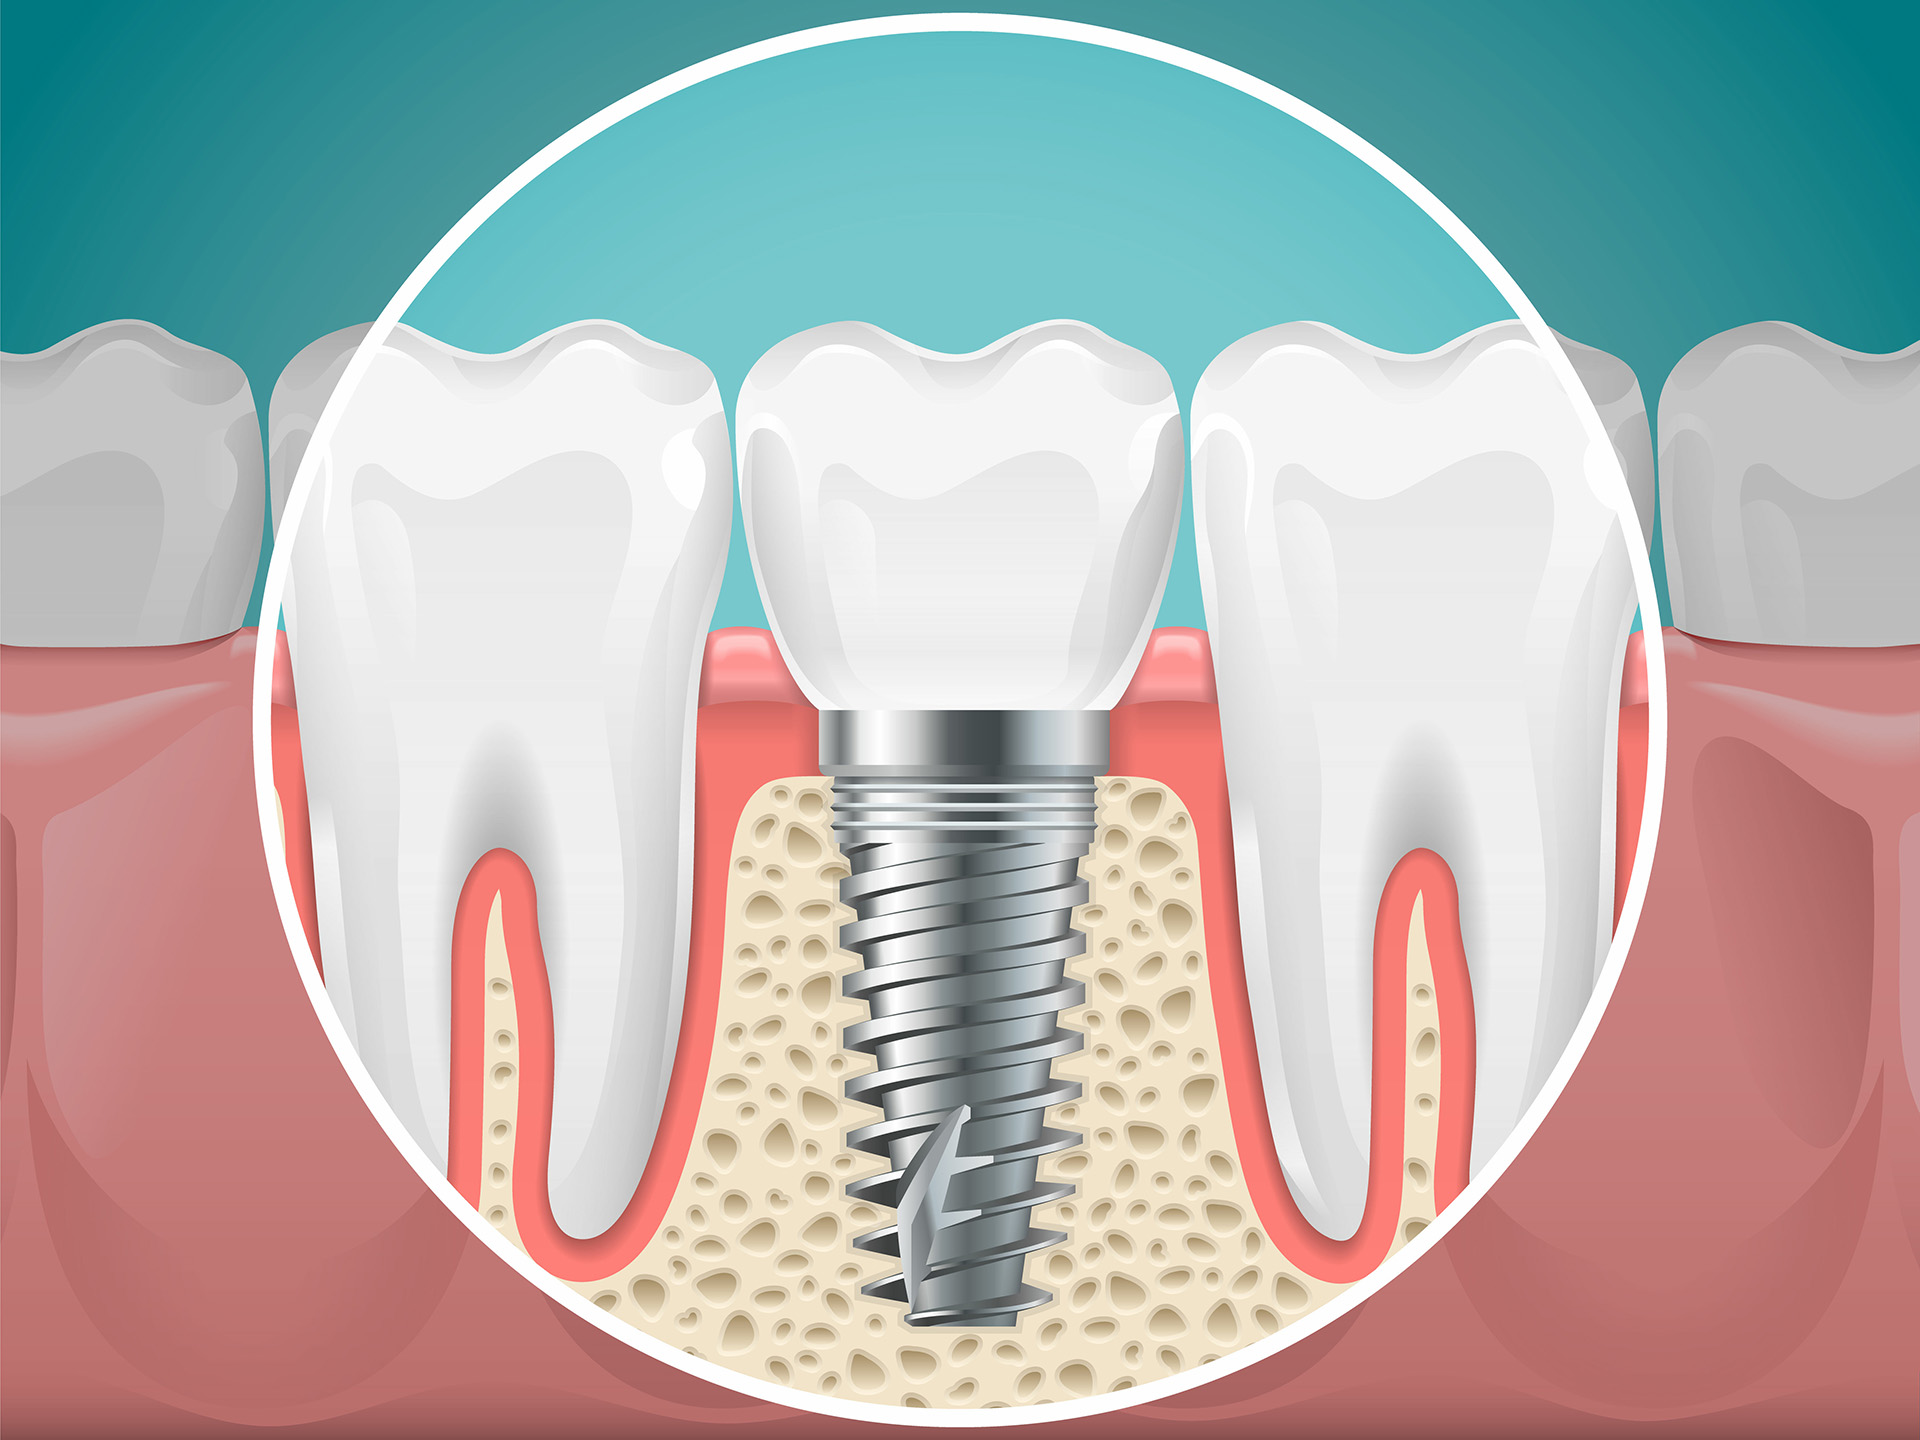
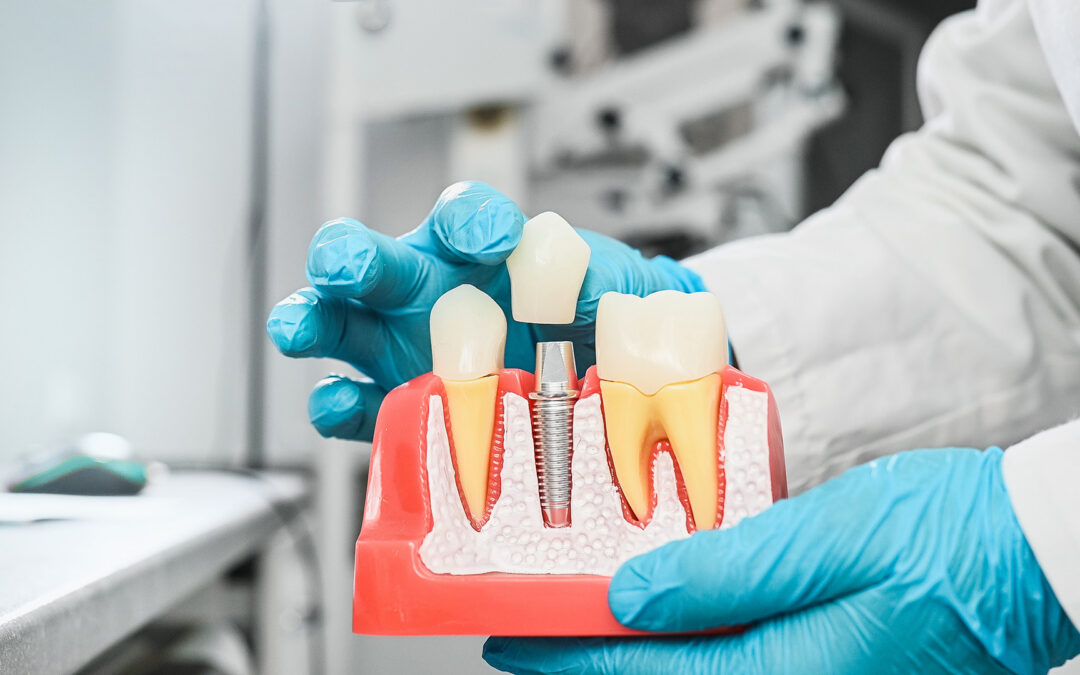
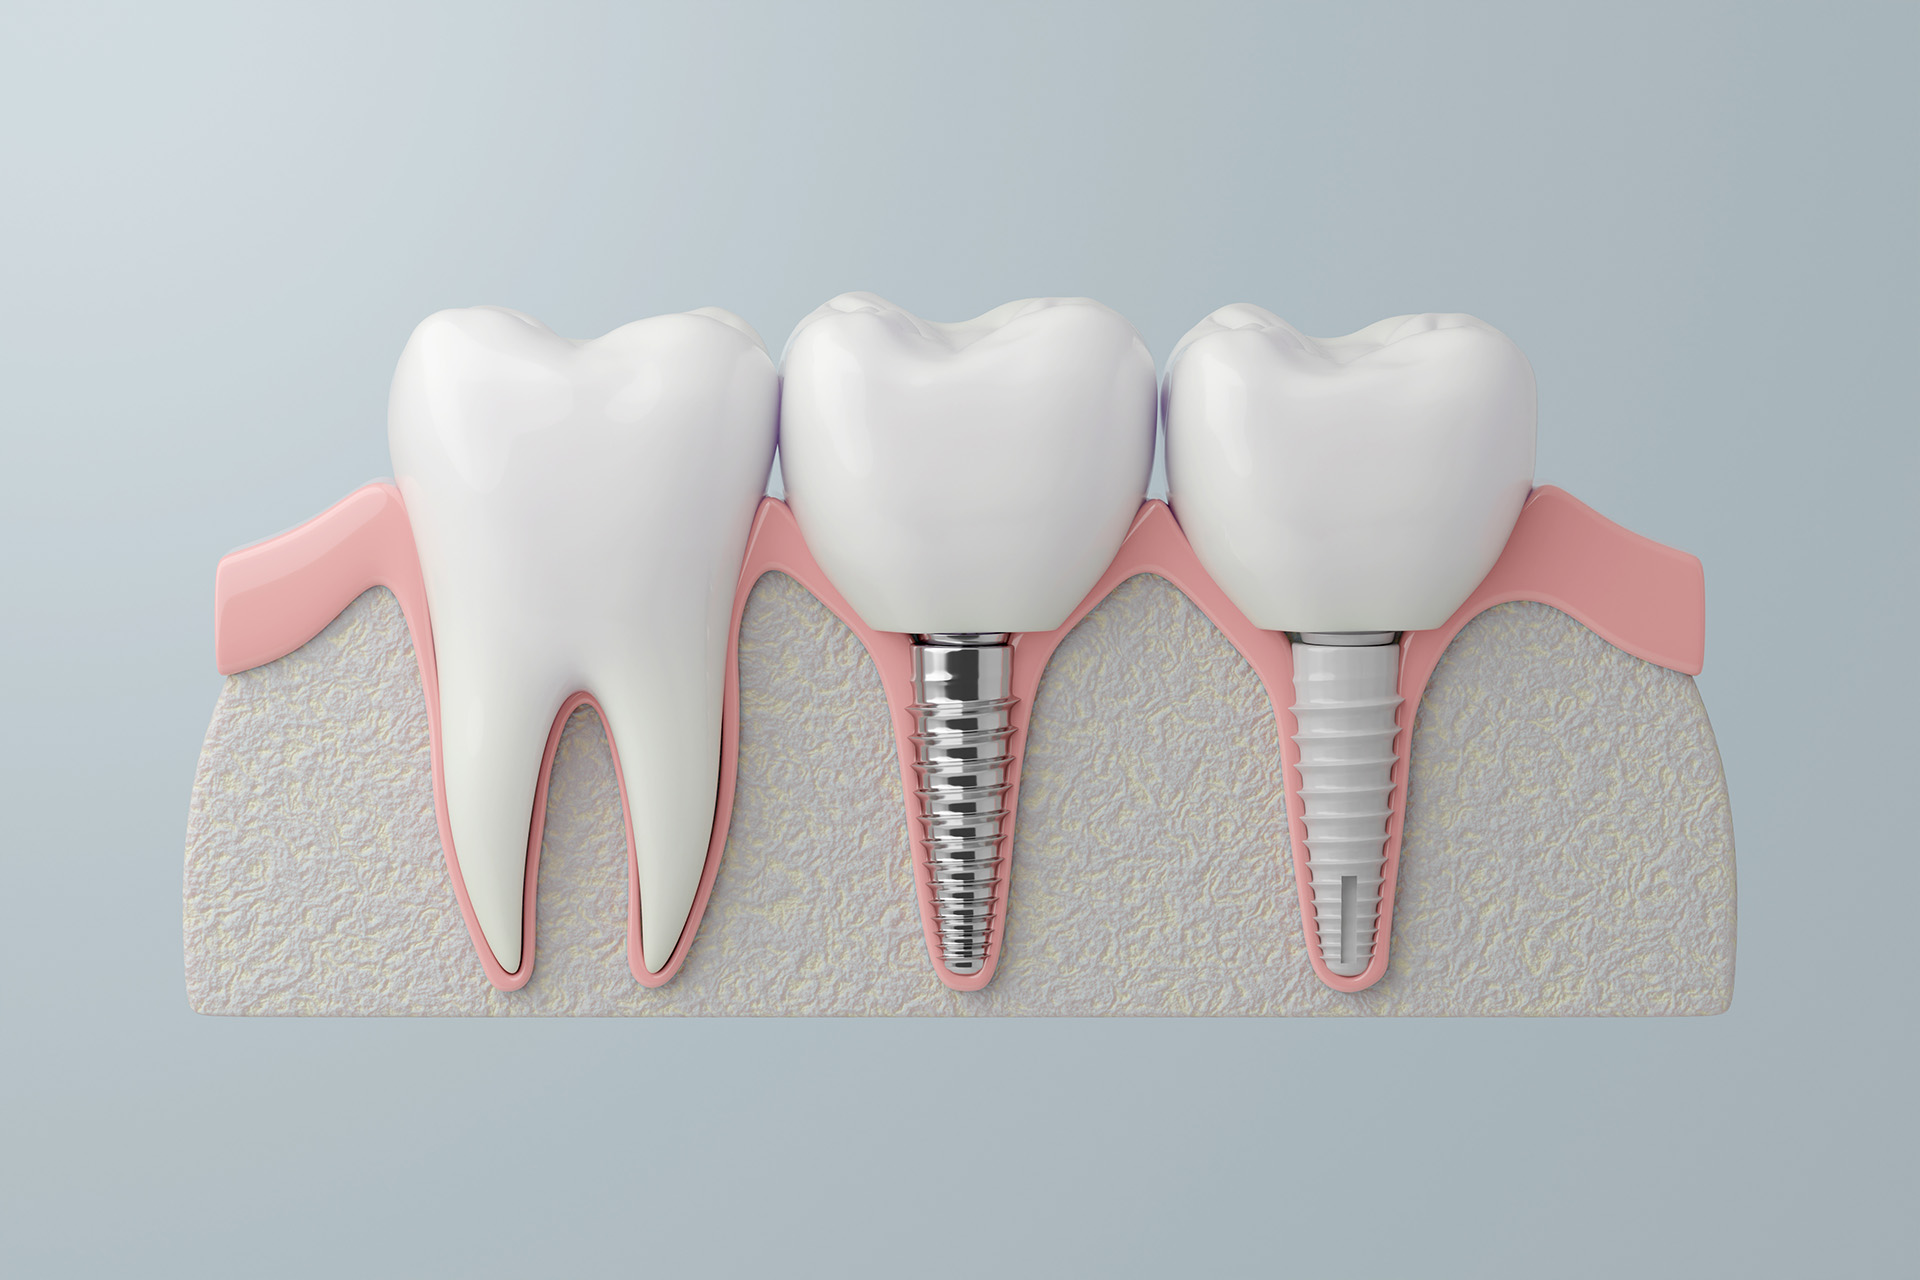
Dental implants are small titanium posts placed in the jawbone to act as artificial roots. After the implant integrates with the bone, a custom abutment and crown are attached to recreate the look and function of a natural tooth. Implants can replace a single tooth, support a bridge for several teeth, or anchor a full arch with implant-supported dentures.
Dentures are removable appliances that replace missing teeth and surrounding tissues. Full dentures sit on the gums to replace all teeth in an arch, while partial dentures attach to remaining natural teeth with clasps. They are typically made of acrylic with or without metal frameworks and rely on suction, adhesives, or clasps for stability.
The major difference is how they interact with your bite and bone. Implants anchor into bone and become part of your chewing system, offering fixed stability and helping maintain bone volume. Dentures rest on the gums without direct bone anchorage, which can make them less stable and allow bone shrinkage over time. This distinction influences comfort, chewing power, speech, and long-term oral health, and is central to understanding why dental implants are better than dentures for many patients.
Benefits of Dental Implants
Stability and comfort are immediate advantages of implants. Because they are anchored in bone, they do not slip when you talk or eat, eliminating the need for adhesives and reducing sore spots. Many people say implants feel like their own teeth, which boosts confidence in social and professional settings.
Implants also support long-term oral health by preserving jawbone density. Natural tooth roots stimulate the jaw with every bite; when teeth are lost, the bone can shrink. Implants mimic that stimulation, helping maintain facial structure and preventing the sunken look sometimes associated with extended denture wear. Unlike some traditional bridges, implants do not require reshaping healthy neighboring teeth.
From an aesthetic standpoint, implant crowns are designed to match your natural teeth in shape, size, and color. Functionally, implants offer strong biting efficiency, making it easier to enjoy a wider variety of foods, from crisp fruits to lean meats, without worry. This combination of natural appearance and dependable function is a key reason many patients prefer implants over dentures.
Dental Implants vs. Dentures: Key Differences
Daily care and maintenance vary significantly between the two options.
Dental implants: Brush twice daily, clean between teeth with floss or a water flosser, and see your dentist regularly, similar to caring for natural teeth.
Dentures: Remove and clean daily, soak overnight, and handle carefully to avoid warping or breakage. Removable dentures may need periodic relines as the jawbone changes.
Cost is another important consideration. Dentures usually have a lower upfront price. However, long-term costs can include adjustments, relines, repairs, and replacement every five to seven years. Implants carry a higher initial investment but are designed as a long-term solution. By helping preserve bone and stabilizing your bite, implants may reduce future interventions related to bone loss and changes in fit, potentially lowering lifetime costs.
In everyday life, implants typically provide a more natural experience. Chewing efficiency is higher, which supports better nutrition and greater meal variety. Speech is often clearer because implants prevent the movement that can cause clicking or lisping. Comfort improves as there is no acrylic covering the palate or pressing on the gums. For many, these practical benefits weigh heavily when considering why dental implants are better than dentures in real-world use.
Ideal candidates have healthy gums, adequate jawbone volume, and a commitment to good oral hygiene. Even if bone loss has occurred, procedures like bone grafting or sinus augmentation can often make implants possible. Non-smokers, or those willing to pause smoking during healing, tend to have higher success rates since smoking can impair blood flow and slow recovery.
Certain medical conditions may influence planning. Uncontrolled diabetes, active periodontal disease, or immune-compromising conditions can affect healing and integration. Many patients with well-managed health issues can still pursue implants with a customized plan. A comprehensive evaluation, including dental imaging and a review of your medical history, helps determine suitability and the best approach.
Age is not a barrier. Younger adults with fully developed jaws and older adults seeking a more stable alternative to dentures can both benefit. Your dental history, including extractions, bone changes, or years of denture wear, will guide whether single implants, implant-supported bridges, or full-arch implant solutions are recommended. A consultation with an experienced provider will outline timelines, costs, and expected outcomes tailored to your goals.
Choosing What Works Best for You
Dental implants offer unmatched stability, bone preservation, and natural function, making them a strong choice for many patients comparing why dental implants are better than dentures. That said, every smile and budget is unique. A personalized evaluation will help you understand your options, weigh short- and long-term costs, and choose the path that fits your health, lifestyle, and expectations. Discuss your goals with a dental professional to decide whether implants, dentures, or a combination such as implant-supported dentures is the right fit for you, and to clearly see why dental implants are better than dentures for many, but not all, situations.
Choosing the right anesthesia can make oral surgery more comfortable and less stressful. Whether you are planning a wisdom tooth extraction, a dental implant, or a corrective procedure, understanding the difference between IV sedation and local anesthesia helps you feel prepared and confident. Below, we outline how each option works, who benefits most, and what to expect so you and your oral surgeon can make an informed decision together. Patients often search for IV sedation vs local anesthesia for oral surgery to compare comfort, safety, and recovery. This guide explains how IV sedation and local anesthesia are used alone or together to deliver a smooth experience.
Understanding Your Anesthesia Options
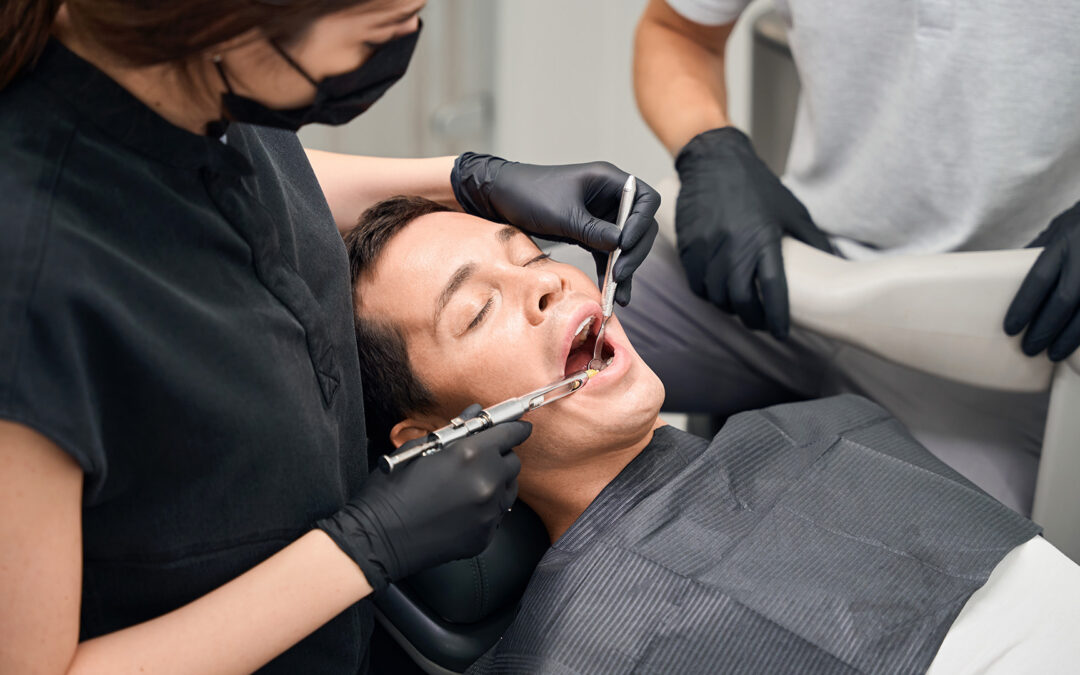
Local anesthesia is a numbing medication injected into the treatment area to block pain signals. You remain fully awake and aware, but the targeted tissues are numb so you do not feel sharp pain during the procedure.
IV sedation (intravenous sedation) involves medication delivered through a small vein in your arm or hand. It creates a deeply relaxed, drowsy state and reduces awareness of sights and sounds. Most patients breathe on their own and remember little, if anything, about the procedure.
Local anesthesia is routinely used for fillings, simple extractions, gum treatments, and minor biopsies. IV sedation is often recommended for impacted wisdom teeth removal, multiple extractions, dental implants, bone grafts, and longer or more complex procedures.
Both methods effectively control pain. Local anesthesia blocks pain at the source, while IV sedation adds an anti-anxiety effect by calming the central nervous system and reducing the sensation of pressure and the perception of time. In many cases, IV sedation is combined with local anesthesia to provide complete numbness with enhanced comfort. When comparing IV sedation vs local anesthesia for oral surgery, keep in mind that they are complementary tools tailored to the procedure and your comfort needs.
Benefits of IV Sedation
IV sedation promotes deep relaxation. Patients feel calm, detached from the clinical environment, and may lightly sleep through parts of the visit. This level of comfort can make lengthy or technically involved procedures feel shorter and easier to tolerate.
For patients with dental anxiety or fear, IV sedation can be transformative. It lowers anticipatory stress, helps control a strong gag reflex, and supports those who have had difficult dental experiences in the past. It can also benefit individuals with a low pain threshold or difficulty remaining still during treatment.
Ideal candidates for IV sedation include patients undergoing complex surgery, those consolidating multiple procedures into a single visit, people with significant dental anxiety, and patients who prefer to remember little of the experience. Your oral surgeon will review your health history, including medications, allergies, and conditions such as sleep apnea or cardiovascular disease, to confirm that IV sedation is appropriate and safe.
Advantages of Local Anesthesia
Local anesthesia precisely numbs a specific area while you remain fully conscious and able to communicate. You may feel pressure and movement but no sharp pain. Because the effect is localized, it avoids sedation-related drowsiness and has a very predictable response.
Recovery with local anesthesia is typically quick. Most patients can drive themselves home, resume normal activities sooner, and experience minimal side effects beyond temporary numbness. It is associated with fewer medication interactions and is suitable for a wide range of patients.
Local anesthesia is cost-effective and straightforward to administer. For straightforward procedures, it often provides all the comfort needed without the extra time, monitoring, or recovery period that sedation requires. Many patients appreciate staying alert and in control while remaining pain-free.
Comparing IV Sedation and Local Anesthesia: Pros and Cons
Safety is a top priority with both options. Local anesthesia has a long, proven track record when administered by trained clinicians and rarely causes systemic effects. IV sedation is also safe when provided by qualified professionals with continuous monitoring of breathing, oxygen level, heart rate, and blood pressure. Your surgical team tailors medications and dosages to your needs.
Potential side effects differ. With local anesthesia, you may experience temporary numbness, tingling, or mild soreness at the injection site, and rarely a prolonged altered sensation. IV sedation may cause drowsiness, grogginess, limited memory of the procedure, and occasionally nausea. You will need a responsible adult to escort you home and should avoid driving or operating machinery for at least 24 hours after IV sedation.
Consideration
IV Sedation
Local Anesthesia
Awareness
Deep relaxation; limited memory of the procedure
Fully awake and aware
Pain Control
Usually combined with local anesthetic for complete numbness
Blocks pain at the treatment site
Anxiety Relief
Strong anti-anxiety effect
Minimal effect on anxiety
Procedure Type
Complex, lengthy, or multiple treatments
Shorter, simpler procedures
Recovery
Requires escort; no driving for 24 hours
Rapid; most can drive themselves home
Cost/Logistics
Higher cost; additional monitoring and time
More cost-effective; simpler setup
Medical Considerations
Not suitable for some health conditions or medication regimens
Fewer systemic effects; broadly suitable
Choosing one over the other depends on the procedure and your preferences. IV sedation may be preferred for complex surgeries, significant anxiety, a strong gag reflex, or when combining multiple treatments in one visit. Local anesthesia may be ideal for shorter, simpler treatments, patients who prefer to avoid sedation, or those with medical histories that make sedation inadvisable. In many cases, using IV sedation for relaxation and local anesthesia for numbness offers the best of both. When evaluating IV sedation vs local anesthesia for oral surgery, discuss your comfort goals, health factors, and scheduling needs to arrive at a personalized plan.
Making the Right Choice for Your Procedure
Consider the following when deciding between IV sedation and local anesthesia:
Your comfort level with dental procedures and needles
Anxiety level and past dental experiences
Medical history, current medications, and allergies
The complexity and duration of the planned surgery
Recovery needs, work or school schedule, and downtime
Transportation availability and support at home
Budget and insurance coverage
During your consultation, your oral surgeon will review your health history, explain the procedure, discuss the risks and benefits of each option, and outline pre- and post-operative instructions. If IV sedation is planned, you will receive guidance on fasting, taking or adjusting medications, and arranging for a responsible adult to accompany you and remain with you afterward. For local anesthesia, you will learn what to expect during numbing, how long sensation may take to return, and how to avoid accidentally biting your cheek or lip while still numb.
Our goal is a smooth, pain-free experience with a safe, efficient recovery. Whether you choose IV sedation, local anesthesia, or a combination, your care plan will be customized to your needs and comfort level. If you have questions about which option fits your procedure, contact your care team to schedule a personalized consultation and review IV sedation vs local anesthesia for oral surgery in detail. Understanding where IV sedation excels, and when local anesthesia is sufficient, helps you feel confident and prepared for a successful outcome.